TwinCAT 3 | Using Source Control in TwinCAT (Git) | Branches and Merge
Recapping
In our last post, we concluded with a question:
How can I manage two programmers in the same Git Repository?
Let’s say
Programmer Aclones our repository with theFB_Clock 1 secondlogic and adds a newFB_Clock with 500 msto it. Meanwhile,Programmer Balso clones the repository with theFB_Clock 1 secondand adds a newFB_Clock with 250 ms. You can easily see that when either programmer commits to the local repository and tries to push to the Git repository, one of their changes will be overwritten.
Let’s see what happens in this case.
Testing Git Conflicts
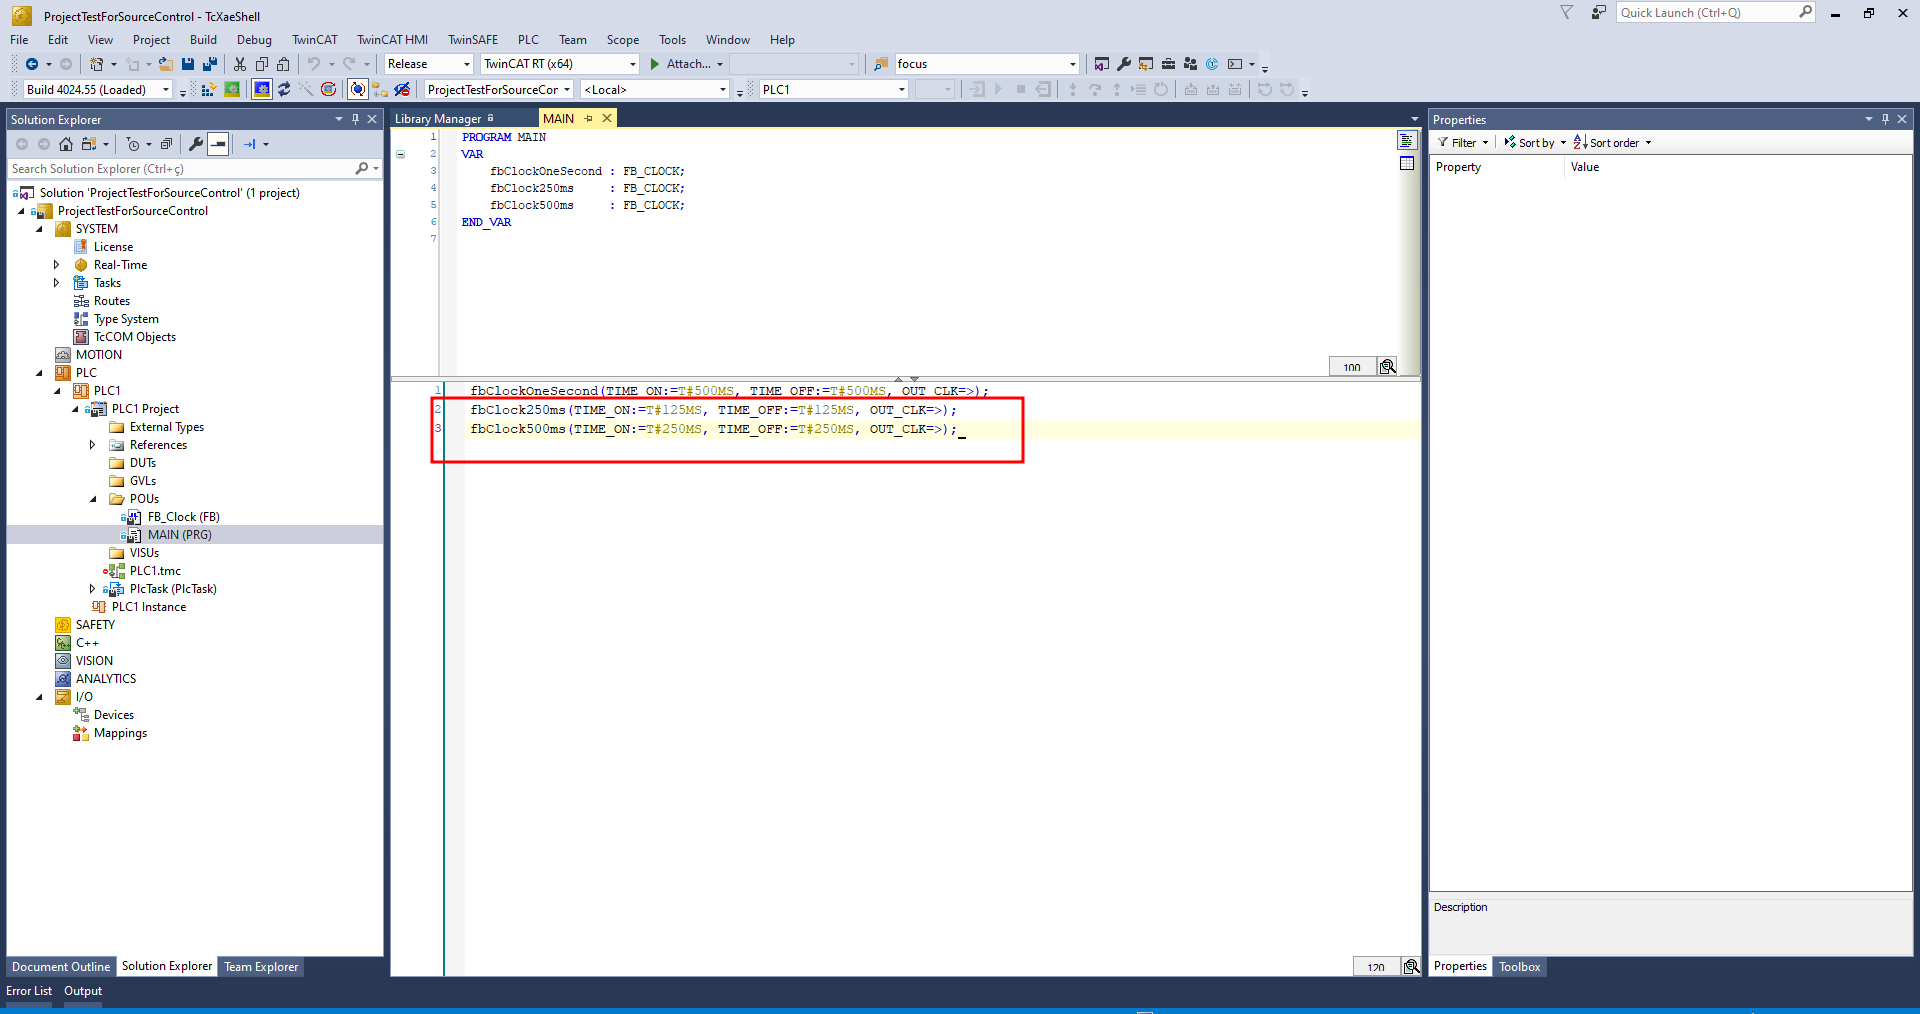
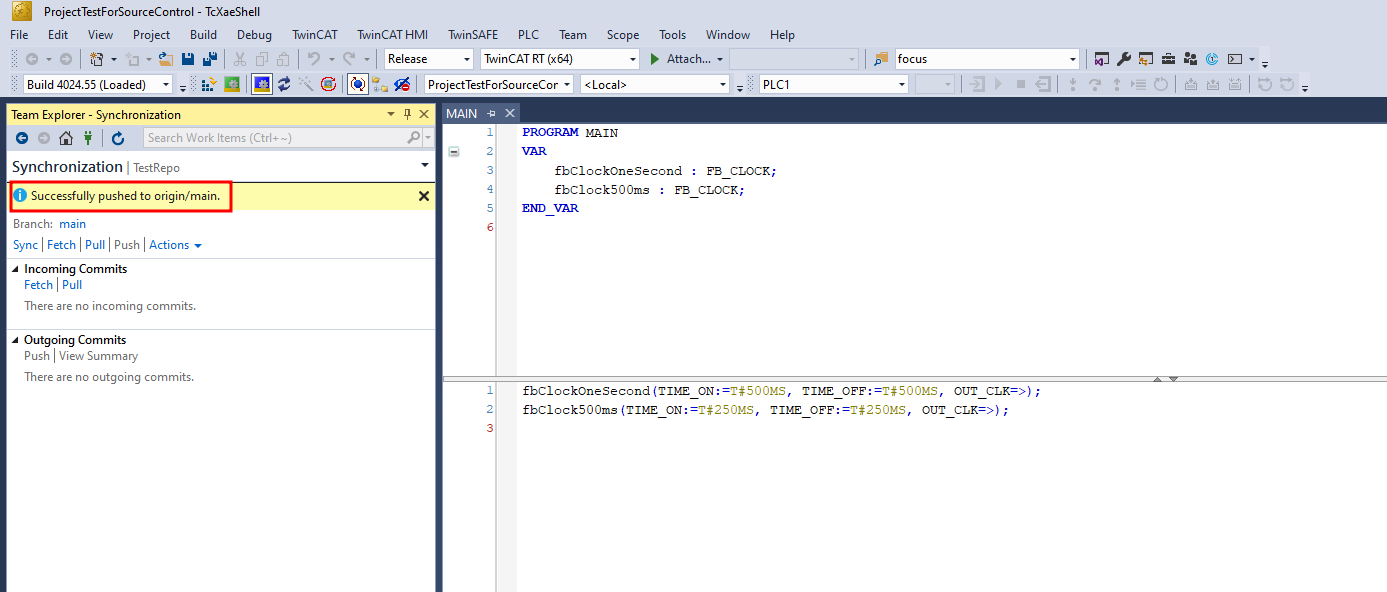
Using the source code from the last post, we have simple logic with an oscillating 1-second clock in the MAIN routine.
So, I cloned this code on two different machines and created two new clocks, as mentioned above. This results in:
It is clear that, when we look at the changes tab, each programmer will have different changes.
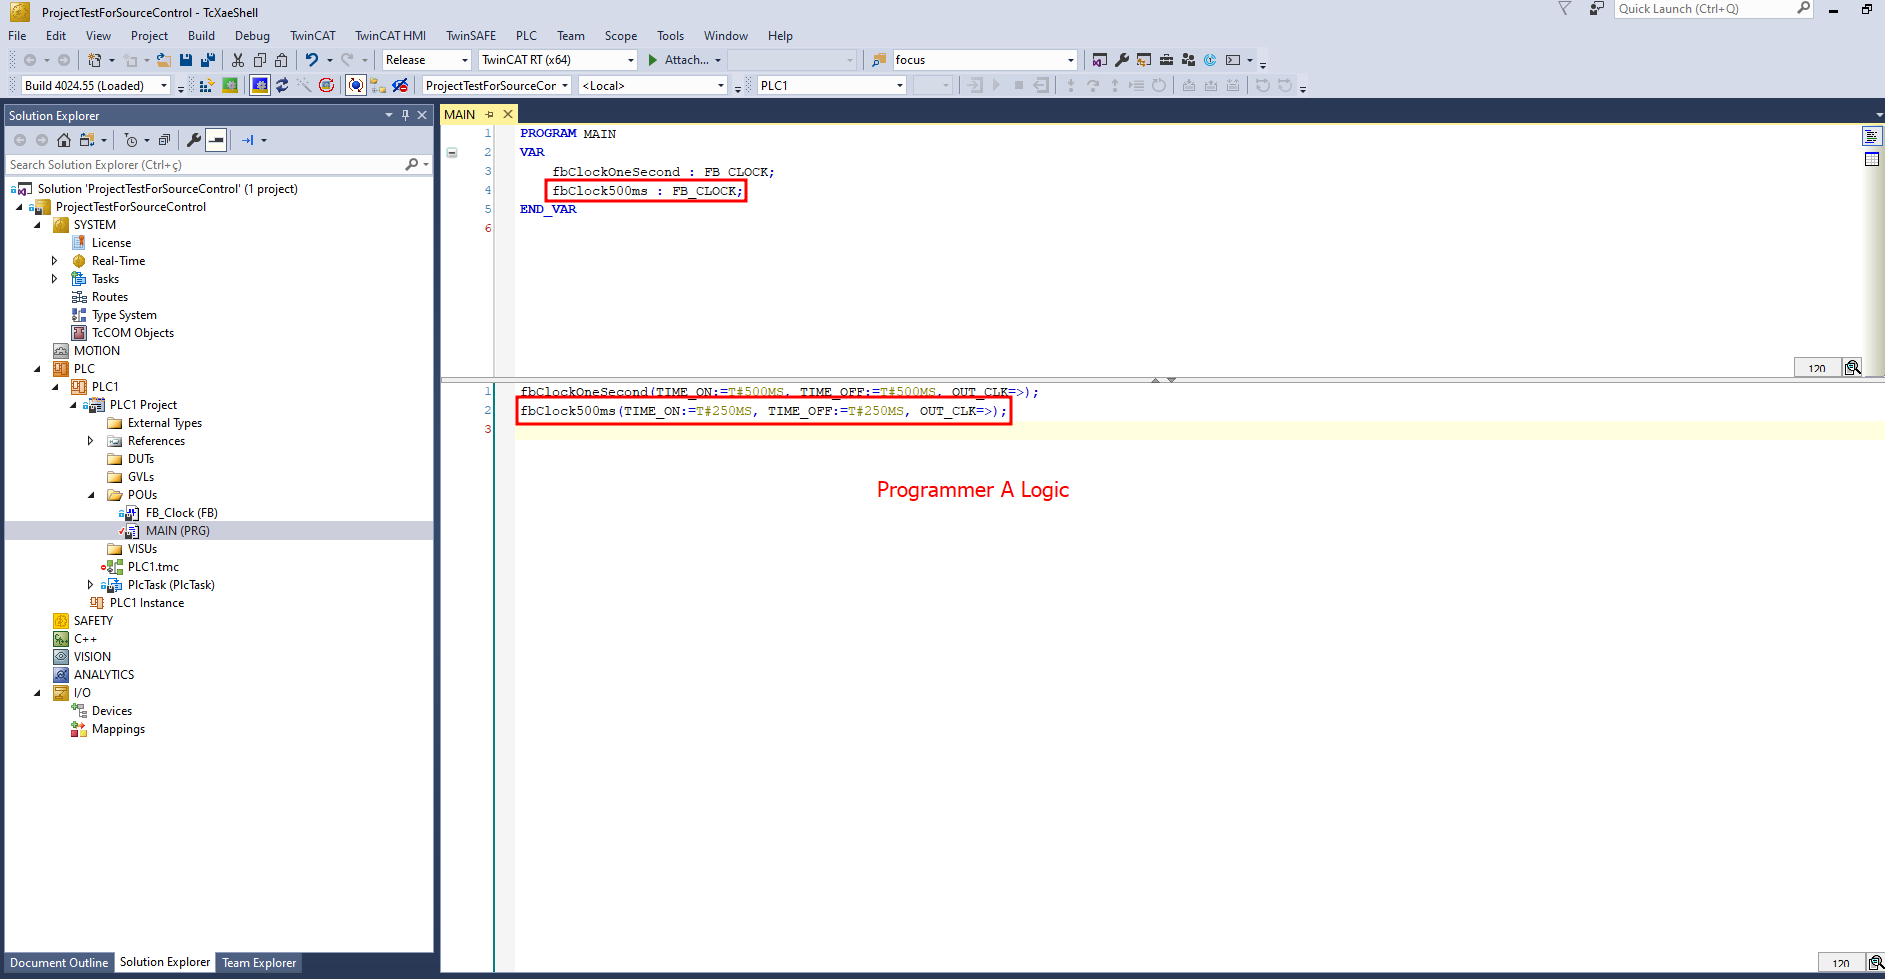
Next, I will Stage and Push the changes made by Programmer A, and let’s see what happens:
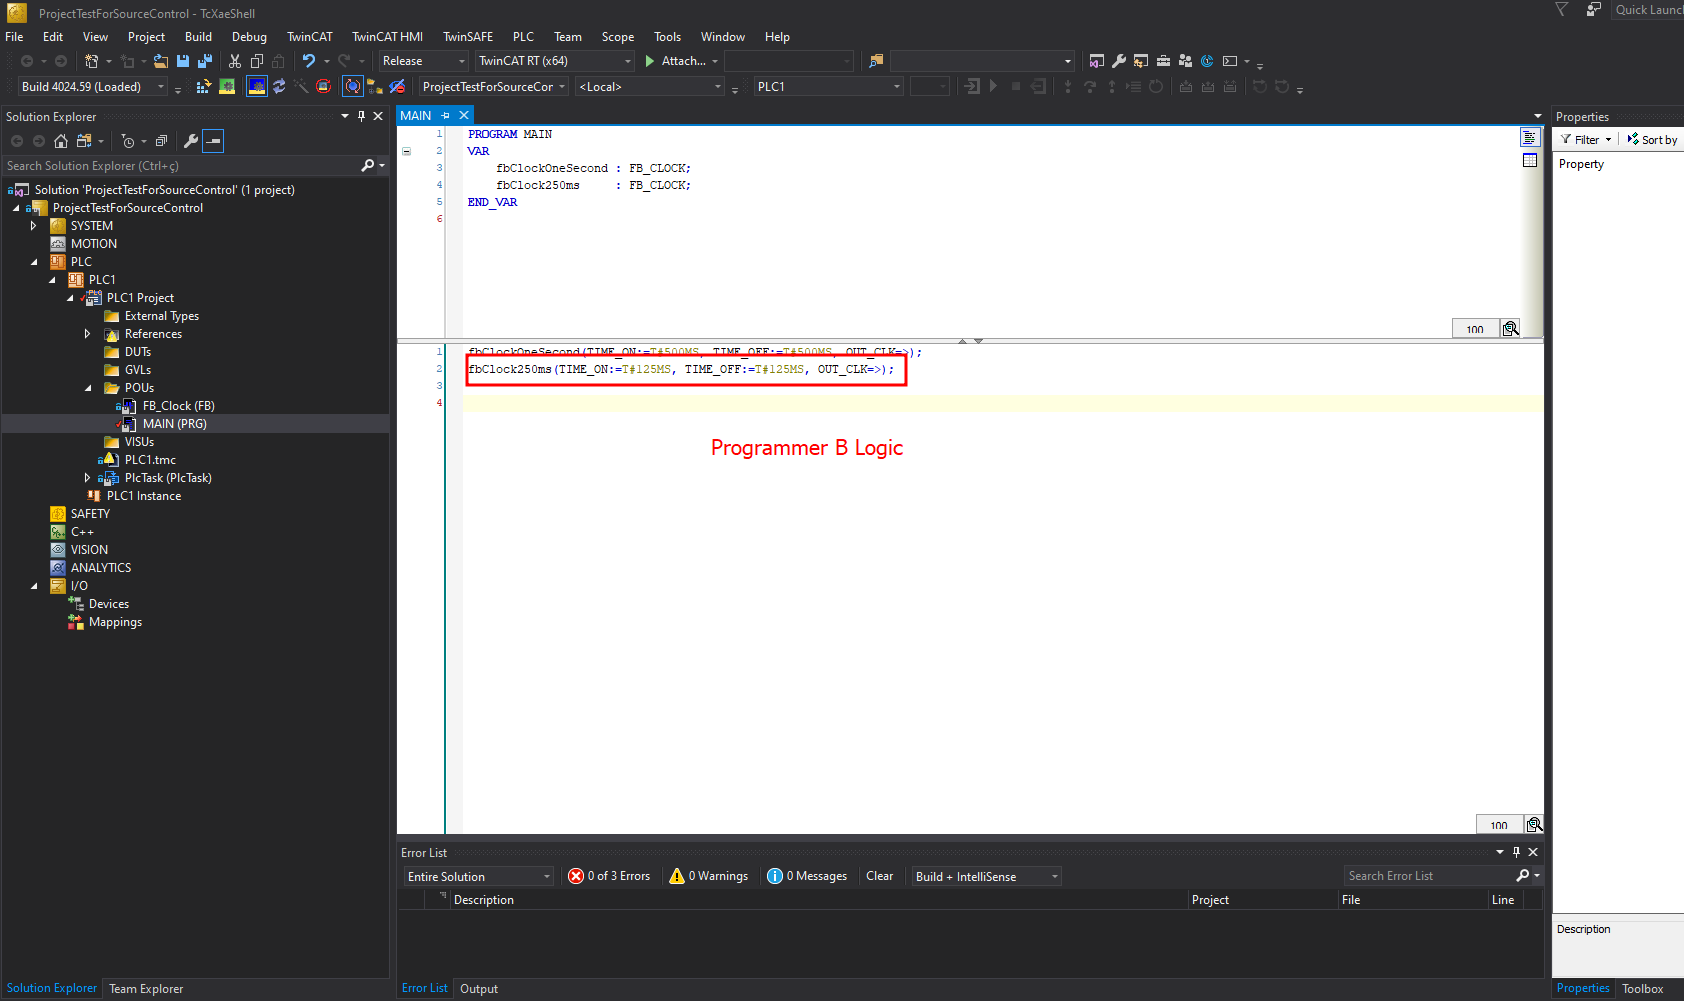
However, when we try to push Programmer B’s changes, we encounter a conflict:
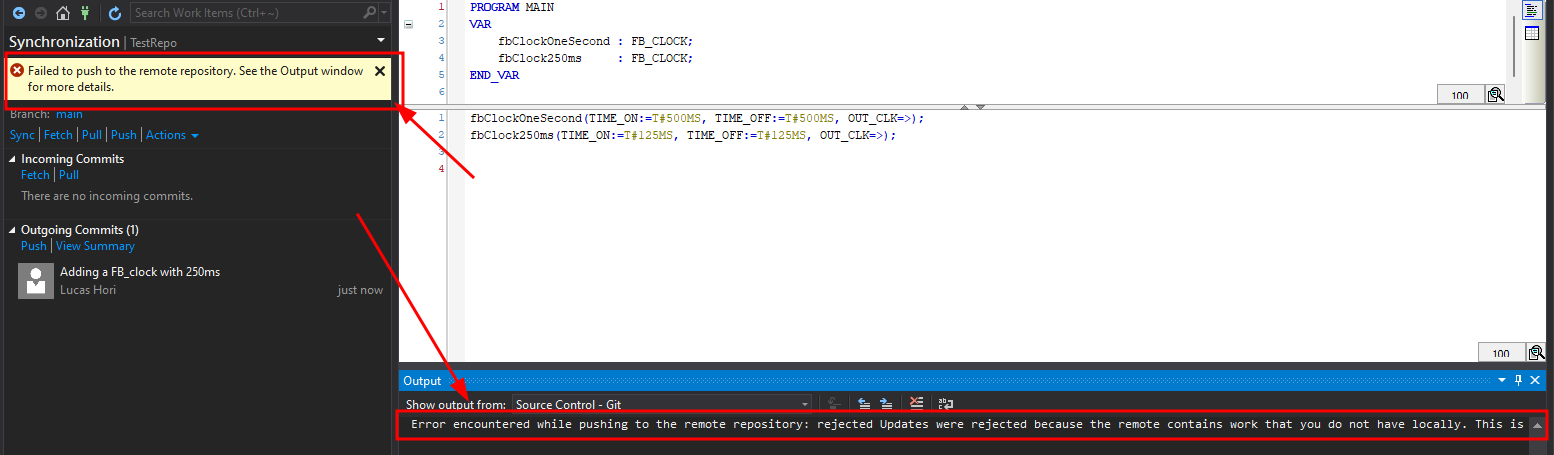
Error encountered while pushing to the remote repository: rejected Updates were rejected because the remote contains work that you do not have locally. This is usually caused by another repository pushing to the same ref. You may want to first integrate the remote changes before pushing again.
In this case, we have a problem and need to manually sync the changes. One solution is to discard Programmer B’s logic (a.k.a. git stash), pull the latest code from Git, and redo all the logic.
But this doesn’t seem like the best solution, right?
To avoid such situations, it’s best to always create a Git resource called a branch. This resource creates a copy of our main branch (or another branch), and we can name it. The advantage is that we can merge the new branch with the main branch after adding new code (and we can see what has changed between the main branch and the new branch).
Creating a Branch
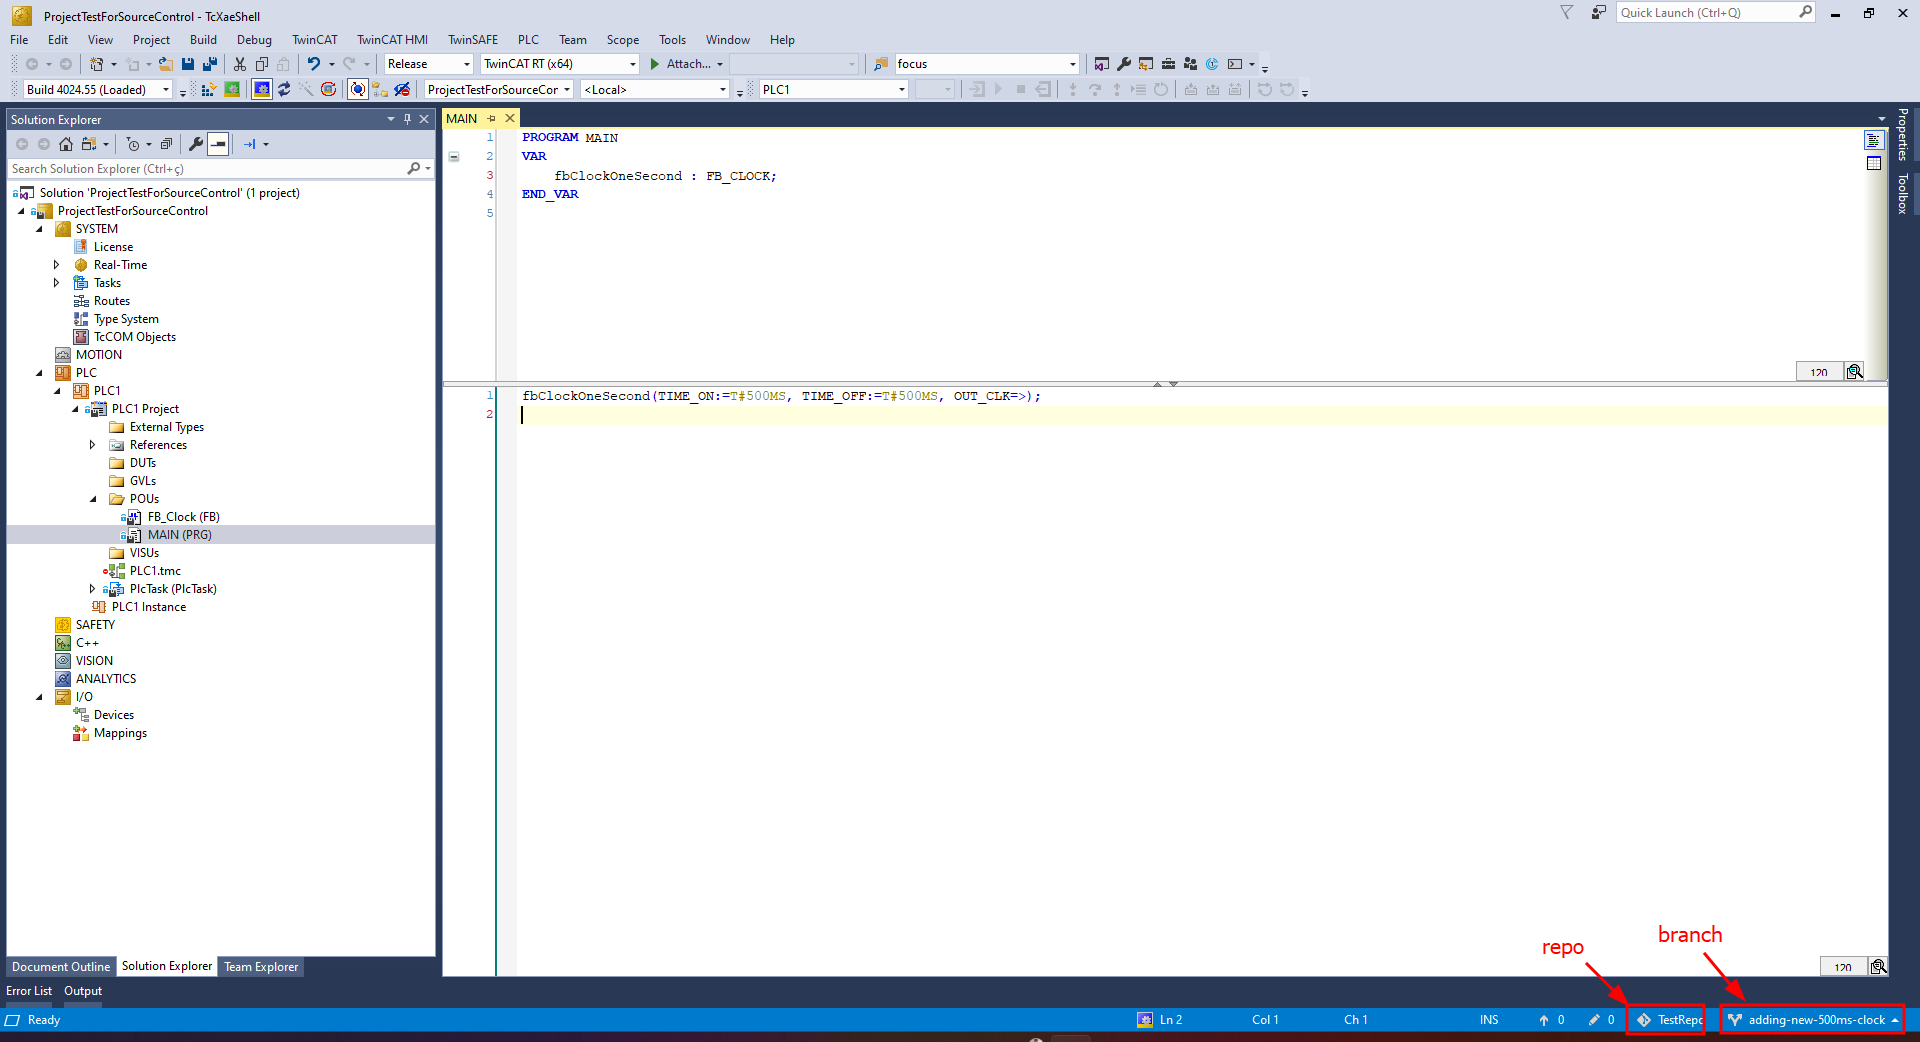
I just pushed the initial logic again (with only the 1-second clock), and now we’ll create a branch before adding new functionalities to the code.
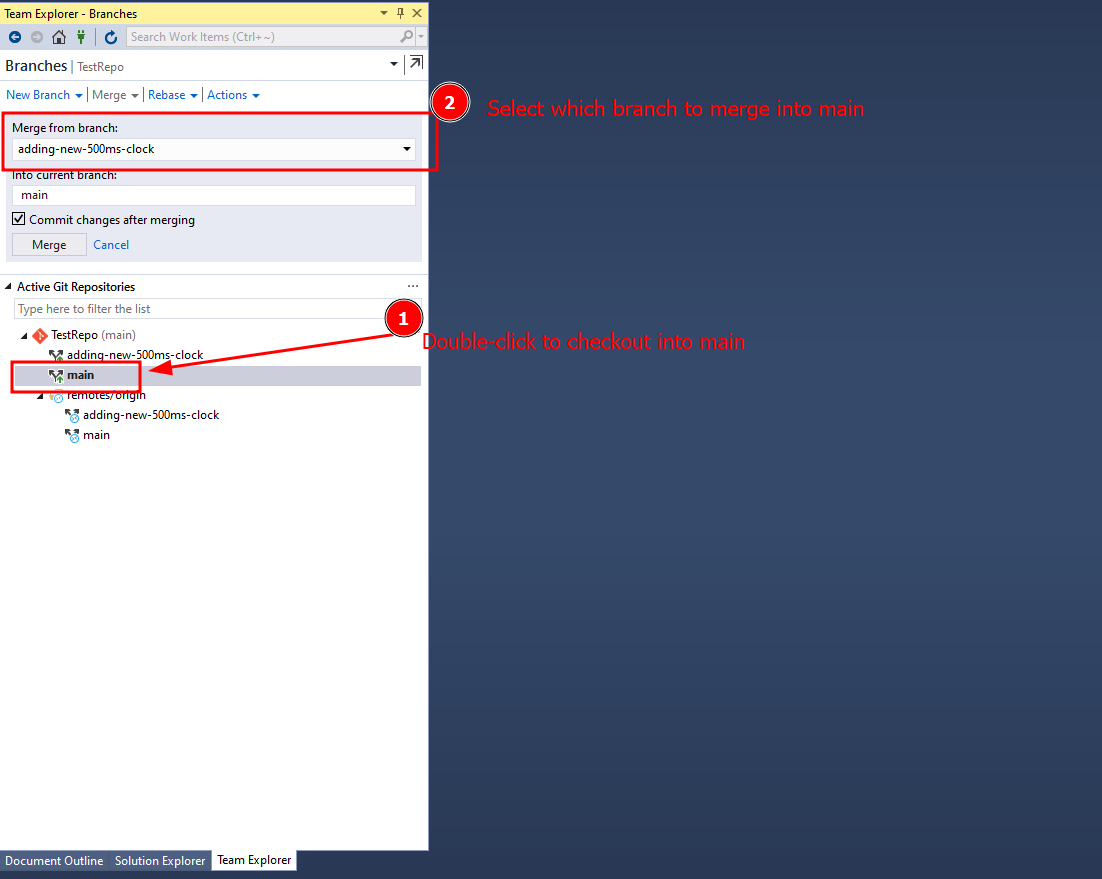
Go to the branches tab:
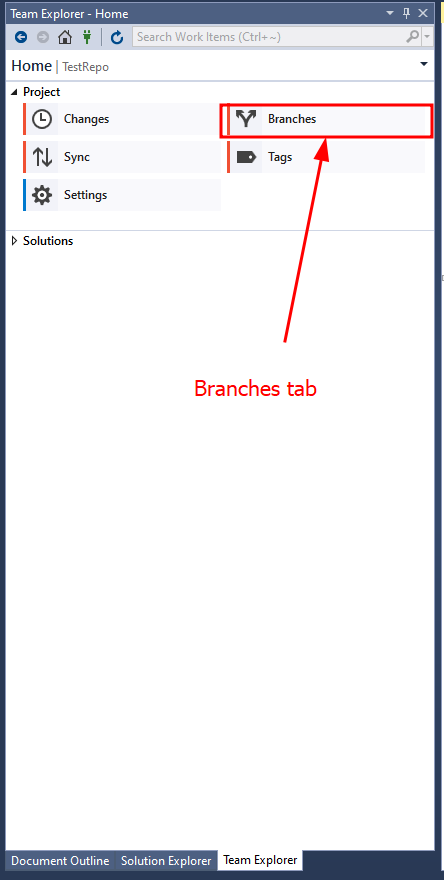
And look for the “New Branch” button.
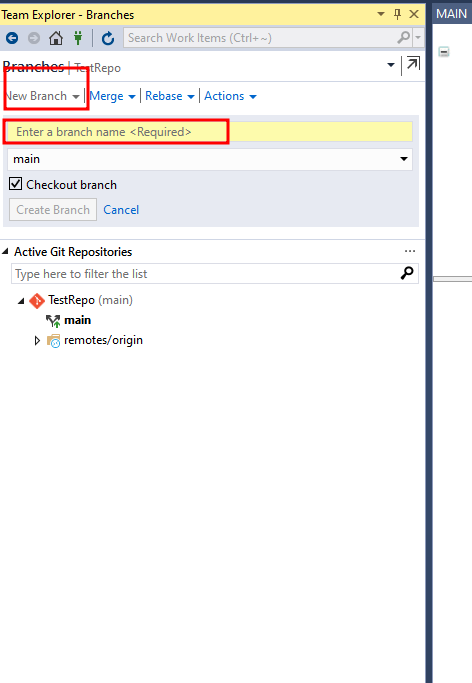
On this page, we can name the new branch and select its origin. Note that we can create a branch from another branch, not just the main branch. The “Checkout” option will switch us to the new branch after it’s created.
Checkout is a Git operation where we select the branch on which we want to make changes.
Always write a clear, concise name about what you’ll do in this branch. Avoid generic texts like “new-branch” or “new-adds.” Instead, use names like “add-ifm-sensor-lub-logic.” Branch names cannot contain spaces or special characters.
Now you should have the branch created and checked out (see that it’s in bold). Double-clicking will switch branches. Let’s select our newly created branch. You can see it selected in the bottom-right corner of the page.
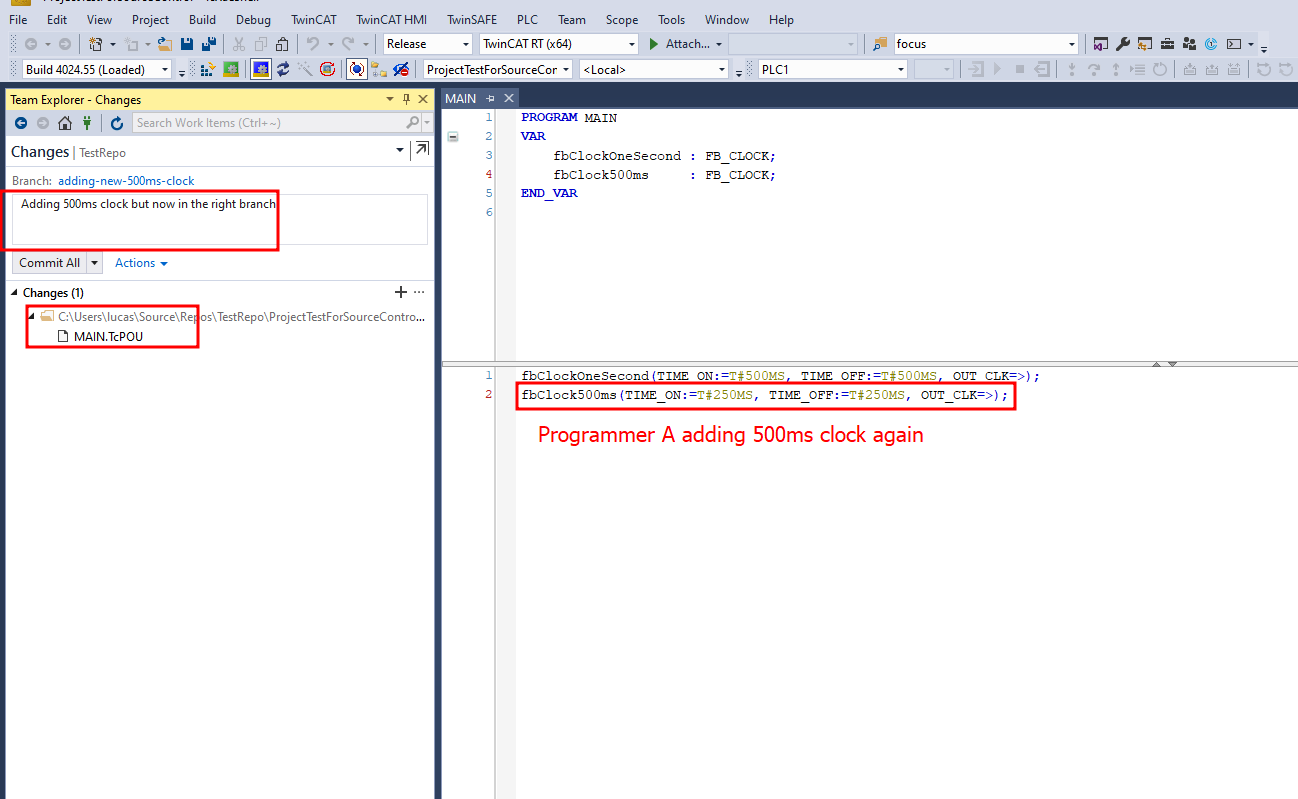
Adding changes on branches
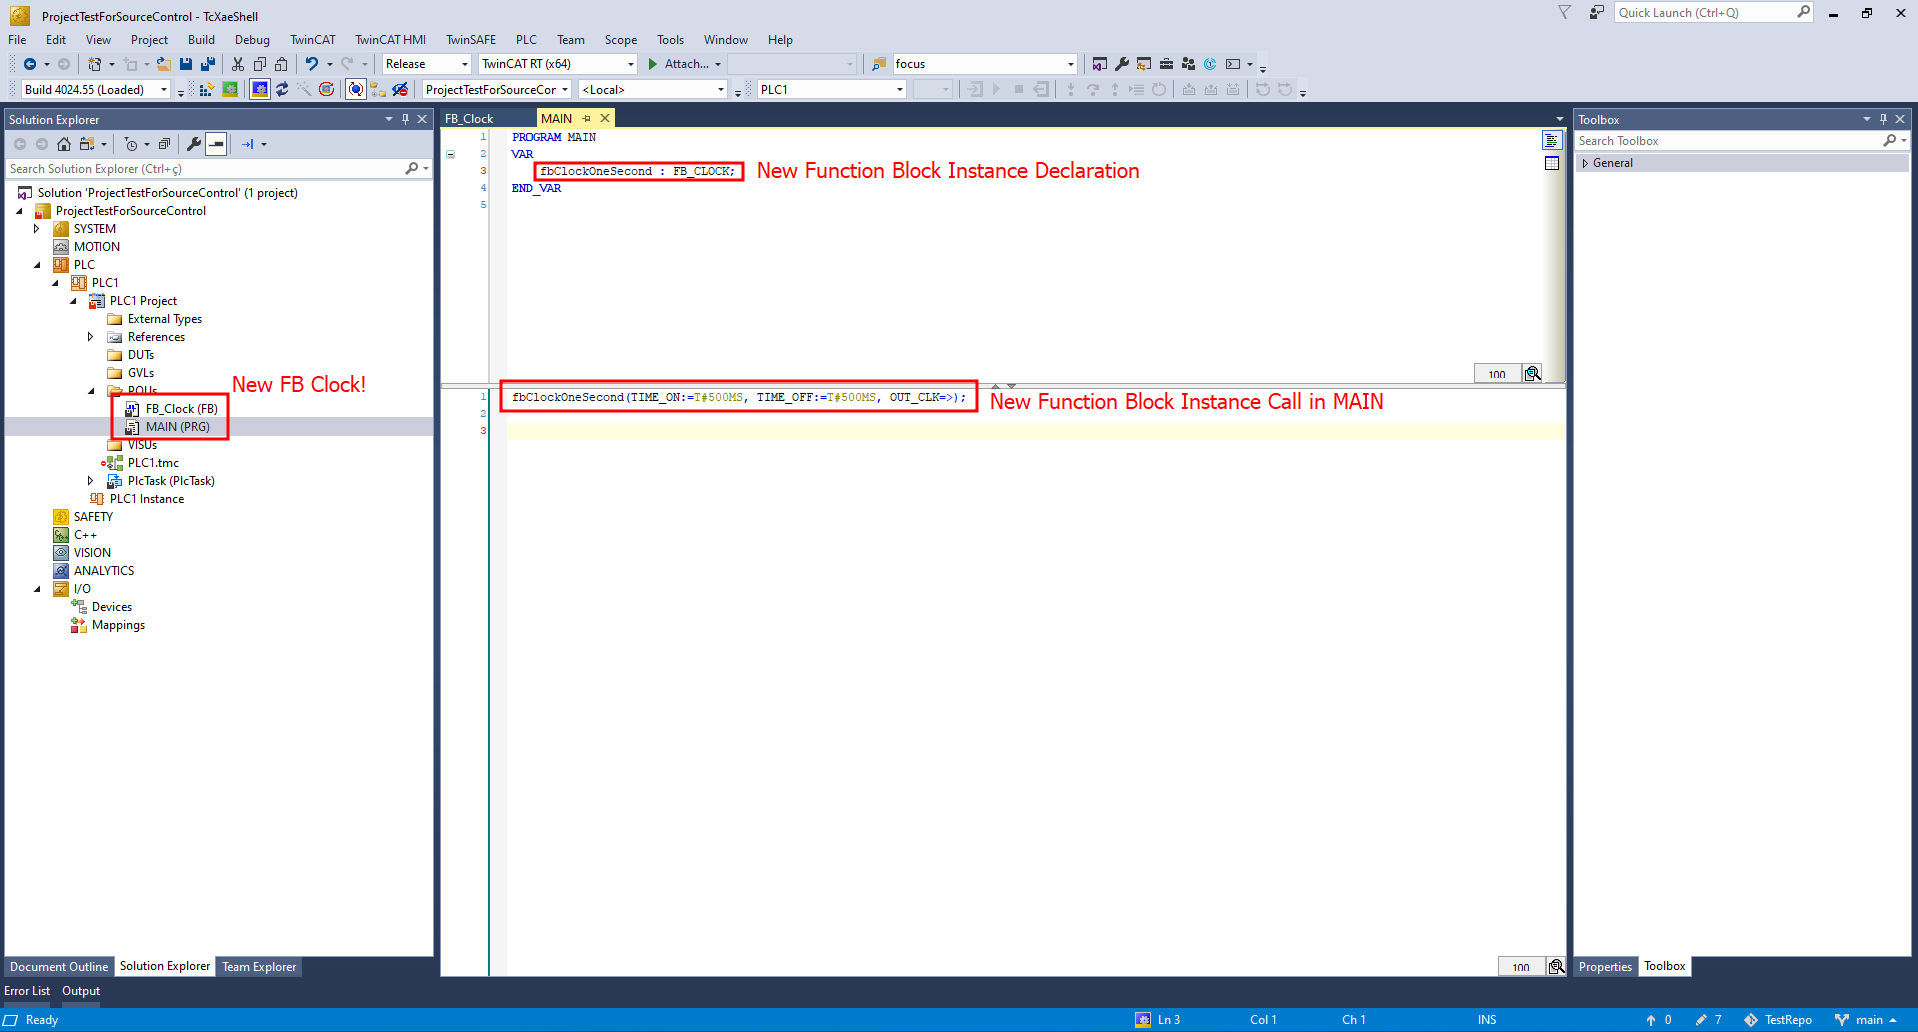
Now, let’s add Programmer A’s 500ms-clock logic again.
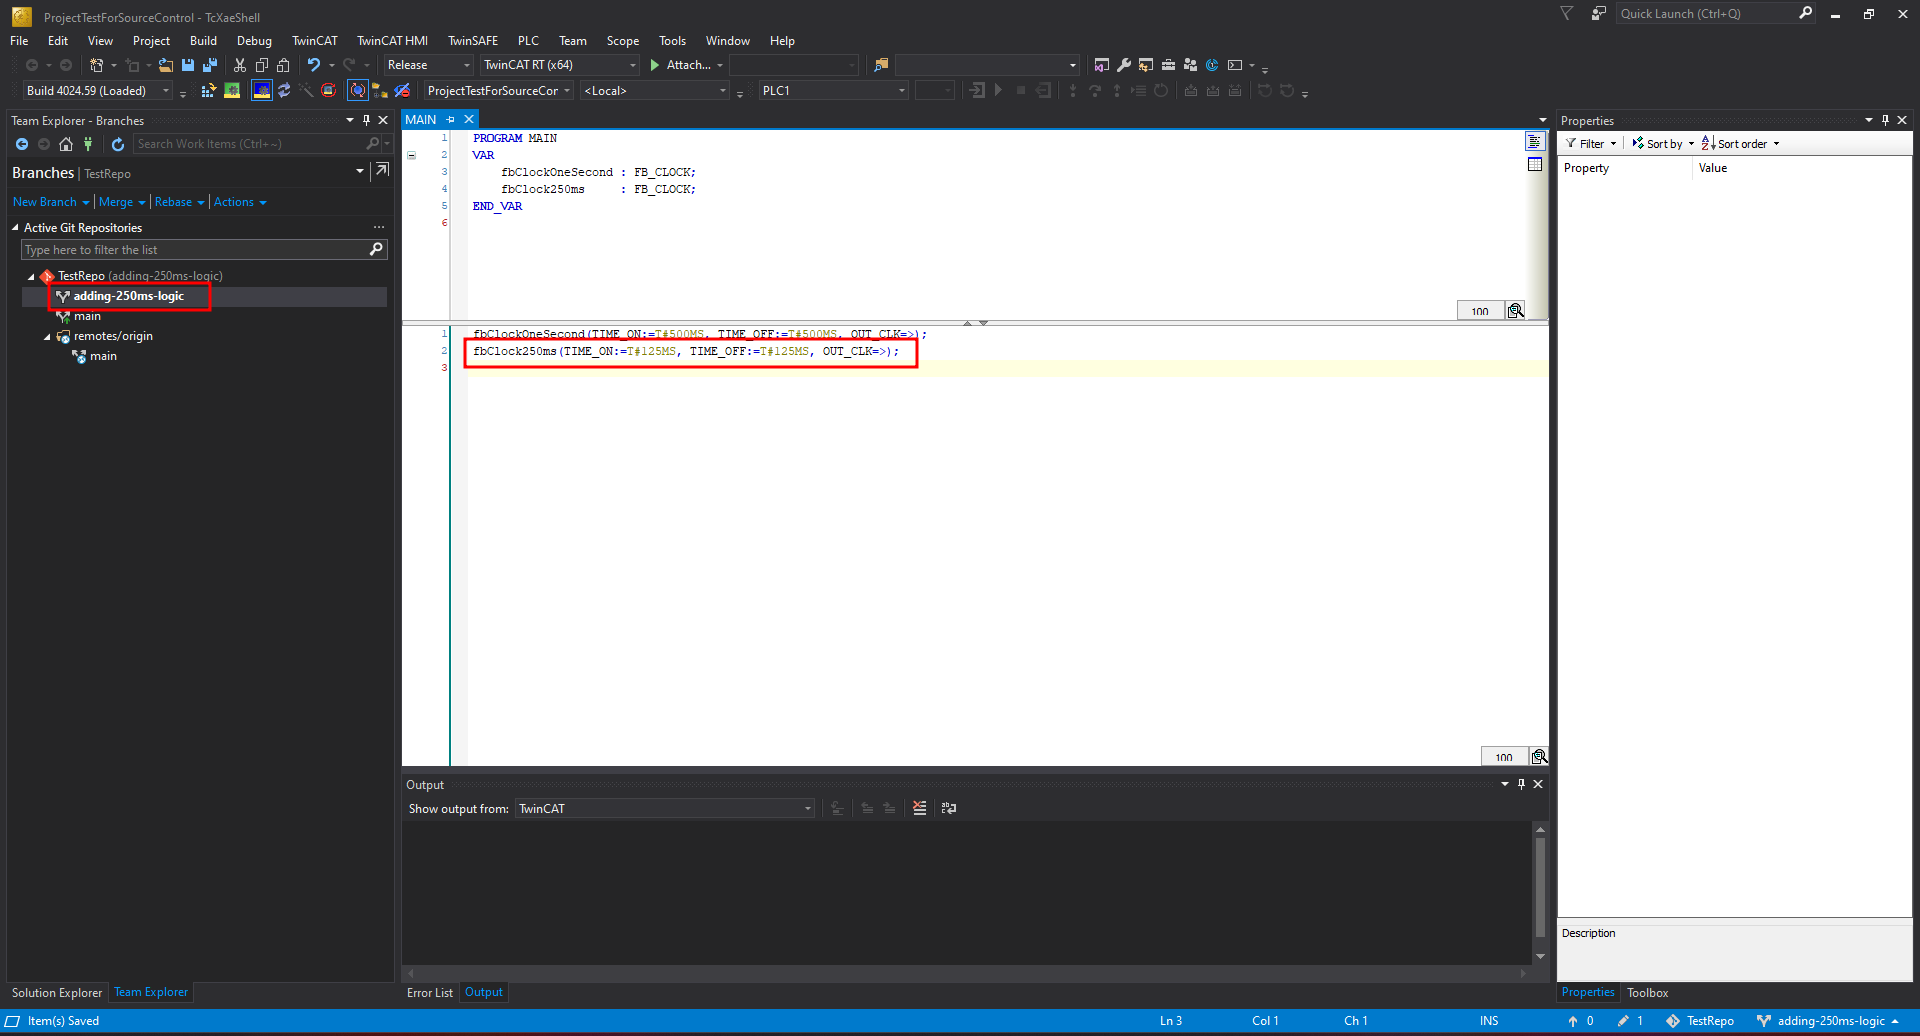
I did the same thing for Programmer B:
- Created a new branch named
adding-250-ms-logicfrom the main branch. - Added a new FB clock with a 250 ms oscillation in the MAIN.pou routine.
- Staged and Committed the changes.
- Pushed (Synced) into the
adding-250-ms-logicbranch.
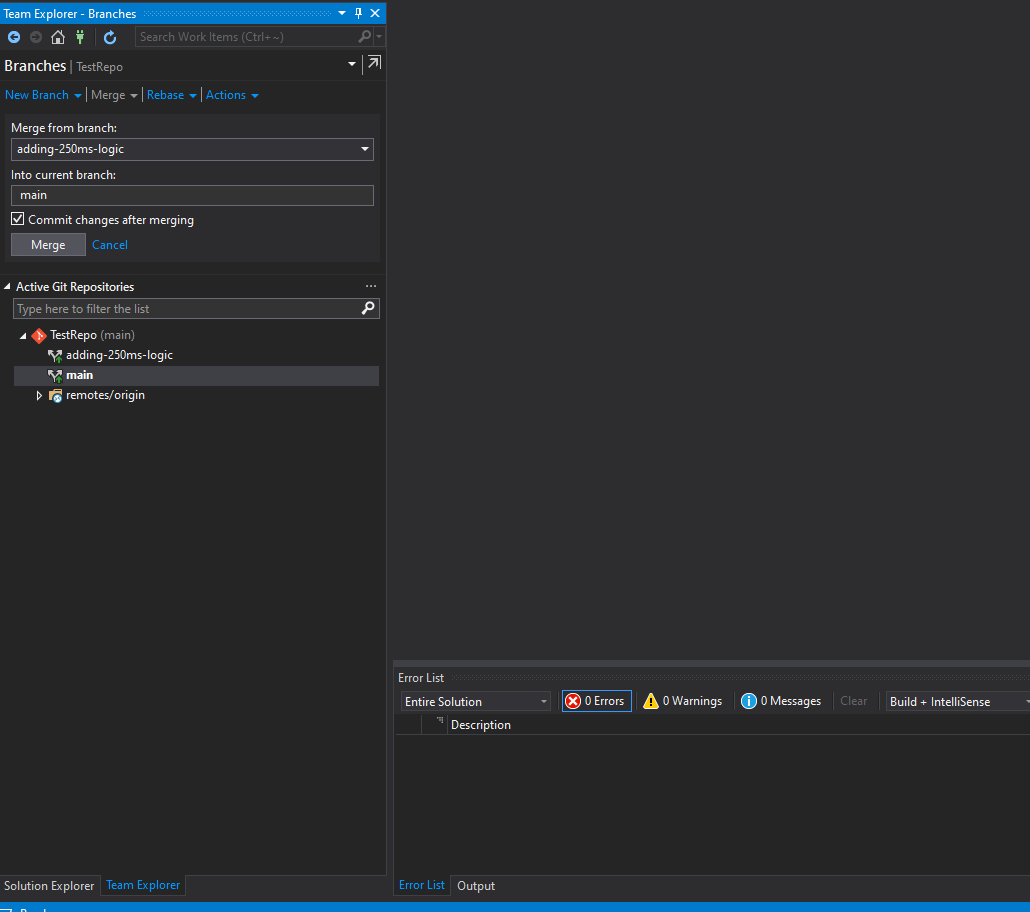
Now we can see both branches on the GitHub page:
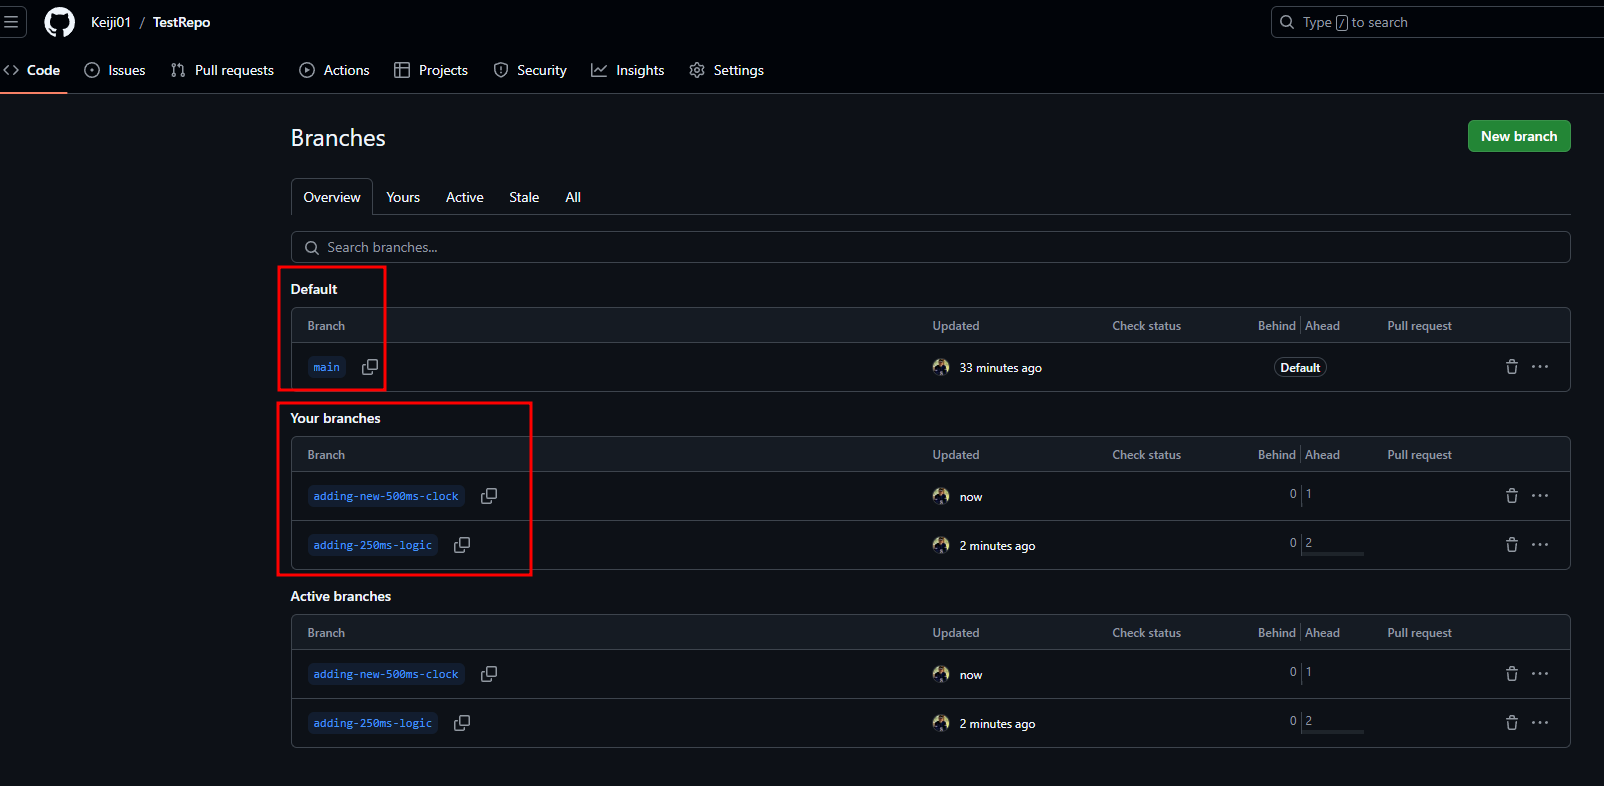
Now we have the main branch with one source code (only the 1-second clock) and two other branches with Programmer A’s and Programmer B’s logic.
The next step is to merge these branches into the main branch. Let’s start with Programmer A:
And do the same for Programmer B:
You can set up an
administratoraccount with privileges to merge into the main branch, providing a first step toward Code Review!
One recommendation in IT programming is to always have an
under_developmentbranch where we merge new changes. After testing, we submit another merge request fromunder_developmentto themainbranch and put the changes into production.
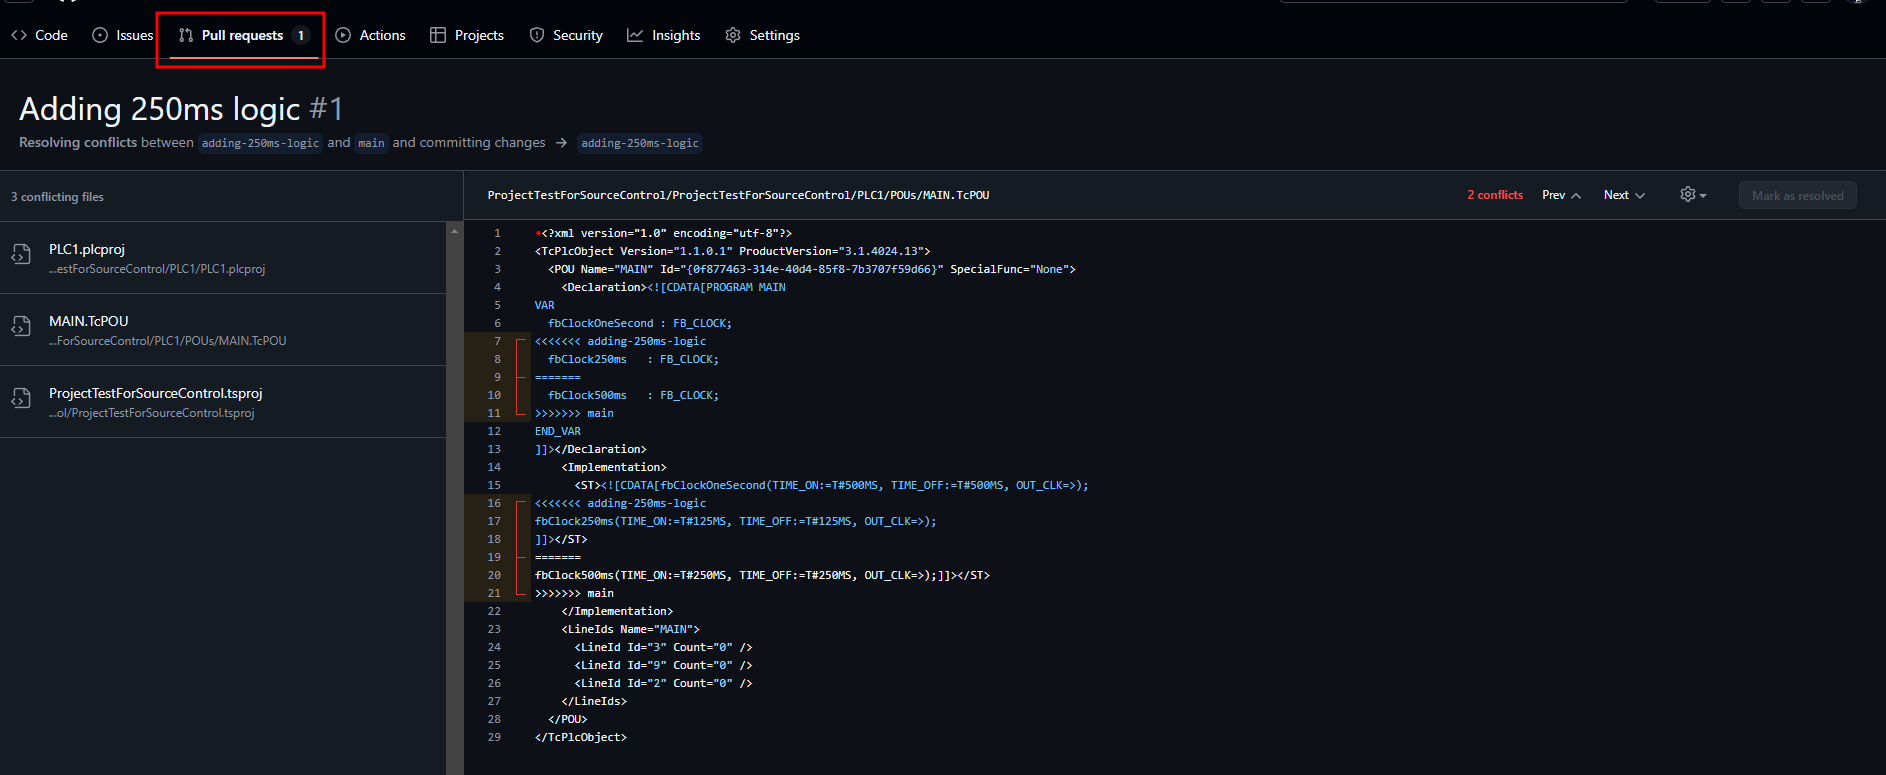
Checking conflicts
Sometimes, you need to check for conflicts on the Git page. This usually happens when you’ve modified the same line of code in both files, but it’s simple to resolve:
Pull request
Now, on Programmer A’s side, we can look for changes by doing a pull request:
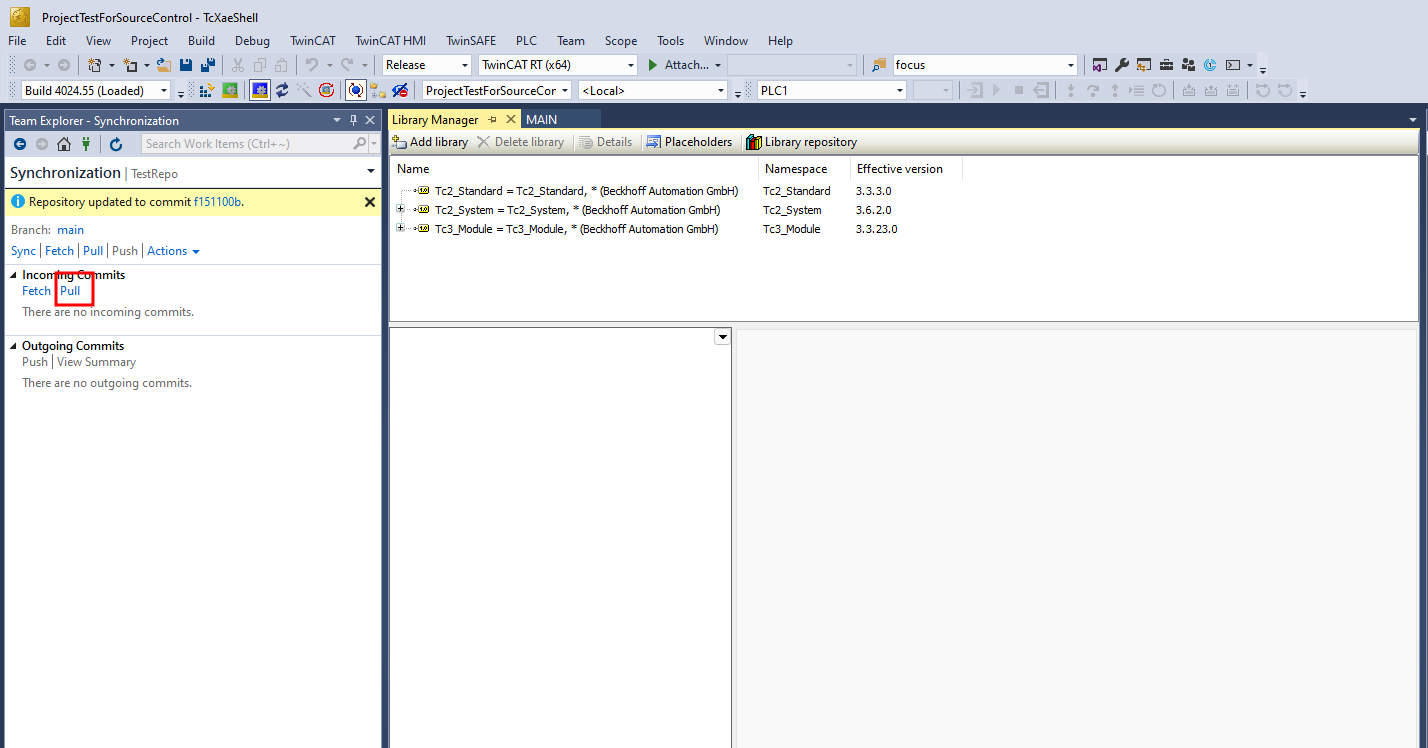
Finally, you should have both programmers’ changes: