TwinCAT 3 | Using Source Control in TwinCAT (Git) | Team Explorer Basics
Remember that this page isn’t affiliated with BECKHOFF and MUST NOT be used as official documentation. For that, please refer to the official BECKHOFF webpage.
All my content is free and the main goal is to provide TUTORIALS. If you plan to use ANY of it in production or application, it MUST be thoroughly tested before implementation (use the code at your own risk).
Introduction
Following my last post, Git is an amazing tool from traditional IT programming for source code control, and we have great tutorials from our colleagues available for free. However, there are some aspects of these tutorials that I would like to change or present in a different way, which is the main reason I developed this dedicated post.
My goals with this post are:
- To demonstrate that it’s possible to use only the TwinCAT 3 XAE Git Integrated tool called Team Explorer, and that we can achieve the expected results.
- To share some knowledge about best practices when using Git, especially in scenarios with more than one programmer.
Using Team Explorer to Manage Git Source Control
GitHub
Creating a new GitHub repository
In this tutorial, we’ll use my personal GitHub to host a test repository (it’s possible to use other Git platforms, such as GitLab, for example).
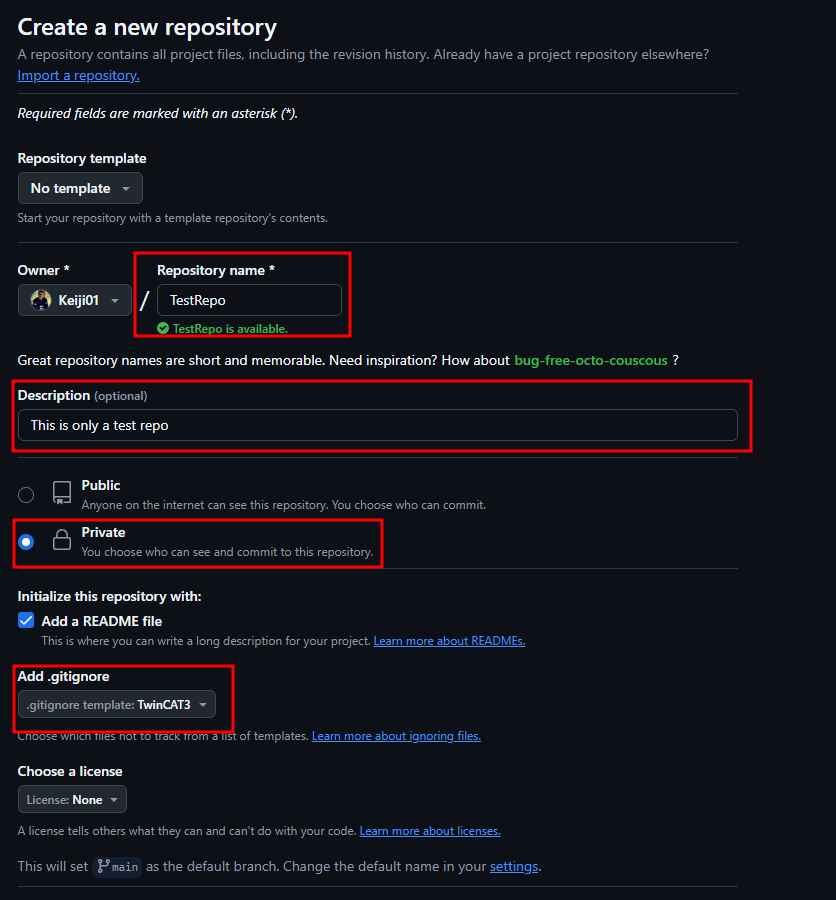
With GitHub open at the repositories tab, click on “New” and create a new repo:

In the settings tab, we must:
- Create a repository name and description (I highly recommend using a good name and a complete description),
- Change sharing settings (as you can see, I created a private repo),
- Add a README file,
- Add a .gitignore template for TwinCAT 3 (to hide some unnecessary tracked changes).
Cloning the GitHub repository using Team Explorer
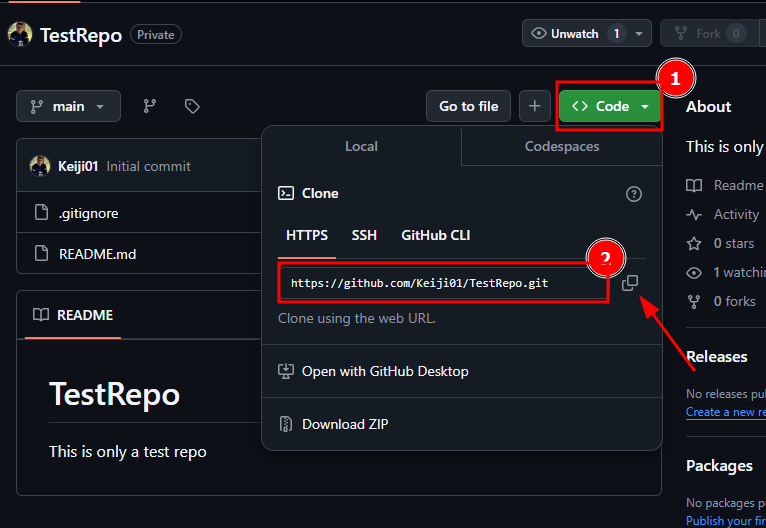
Now we’ve created a repository and want to copy the web URL to clone it on our local machine:
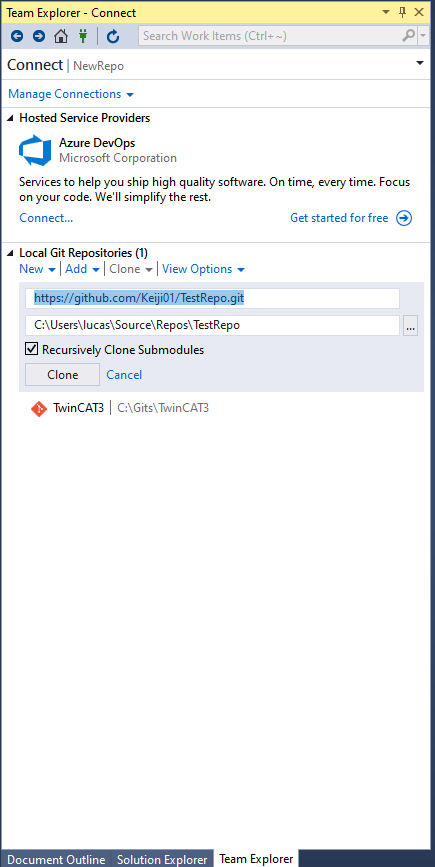
With the repository URL in hand, we can use Team Explorer to clone this fresh new repository to our machine:
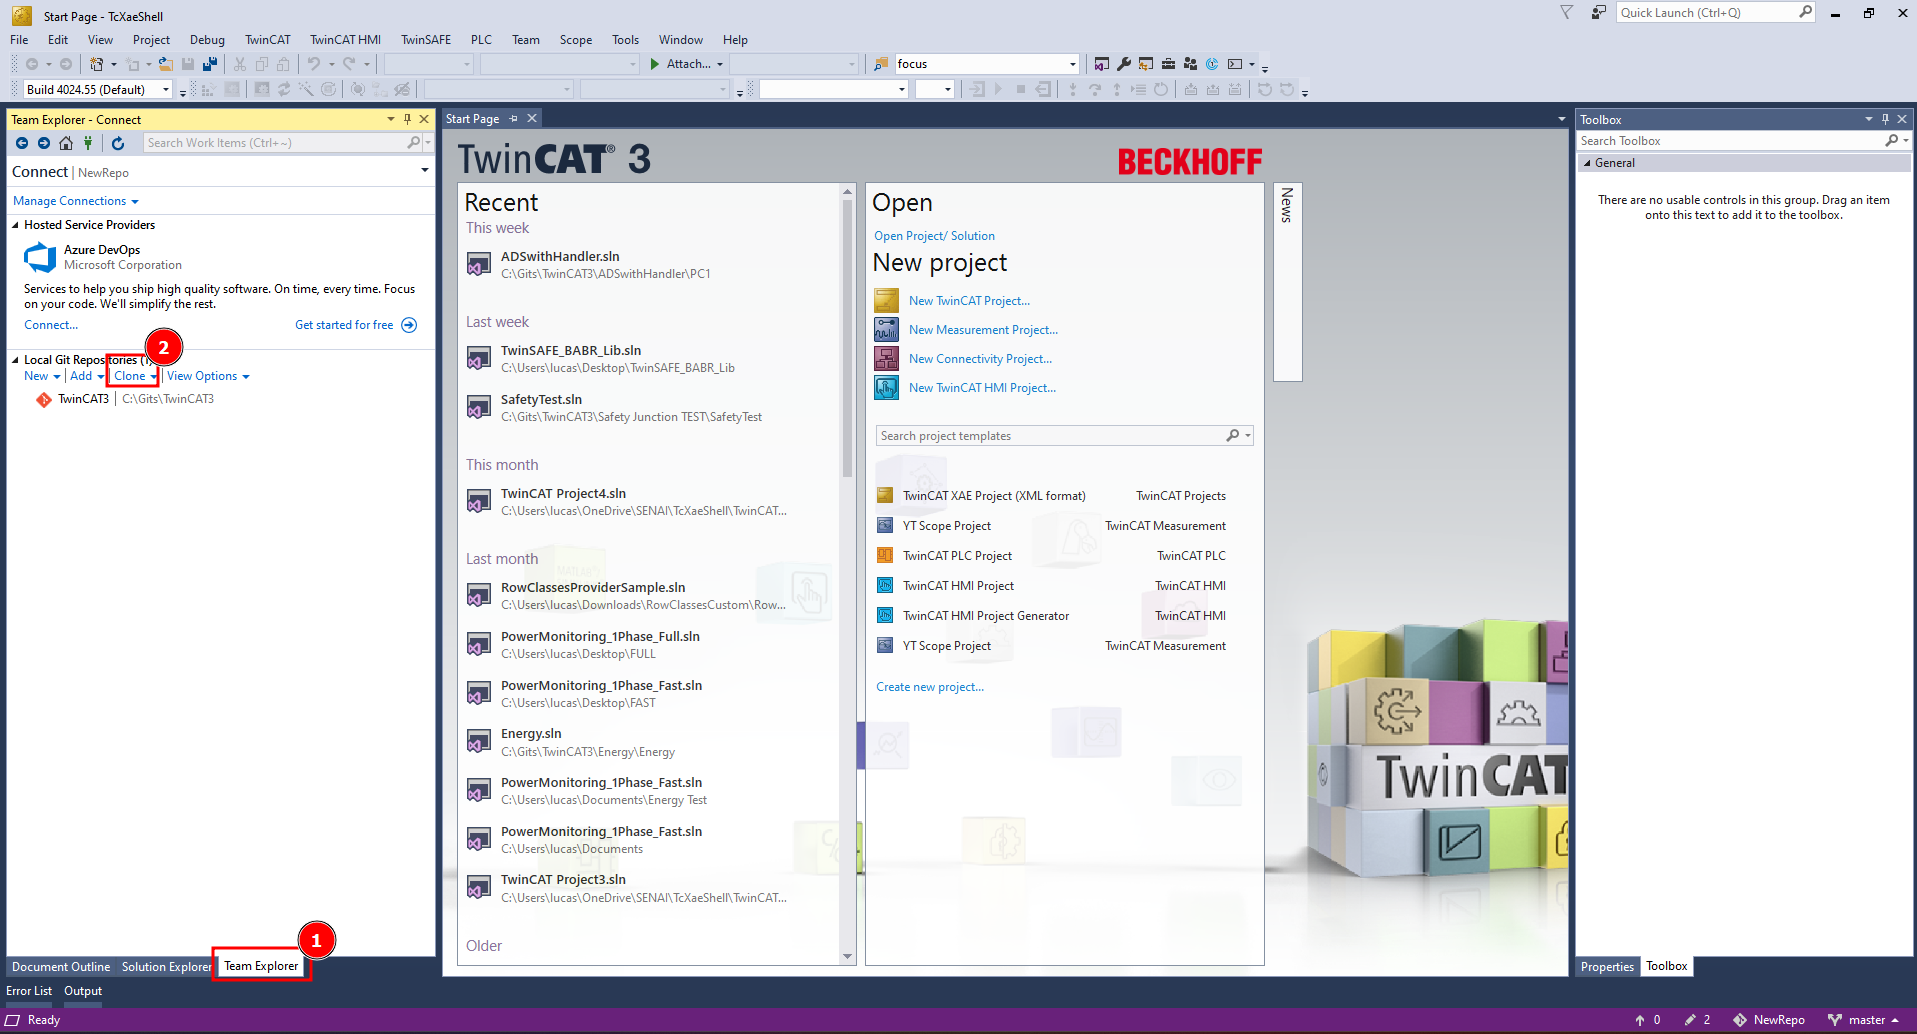
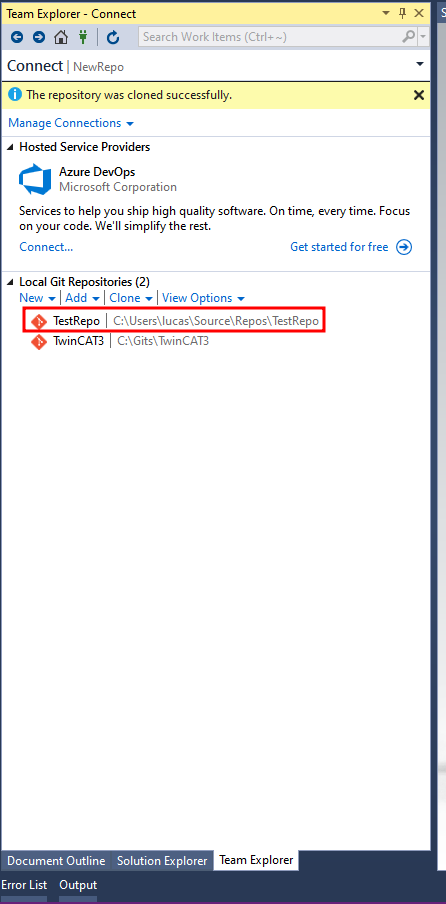
TwinCAT 3 XAE Shell | Team Explorer
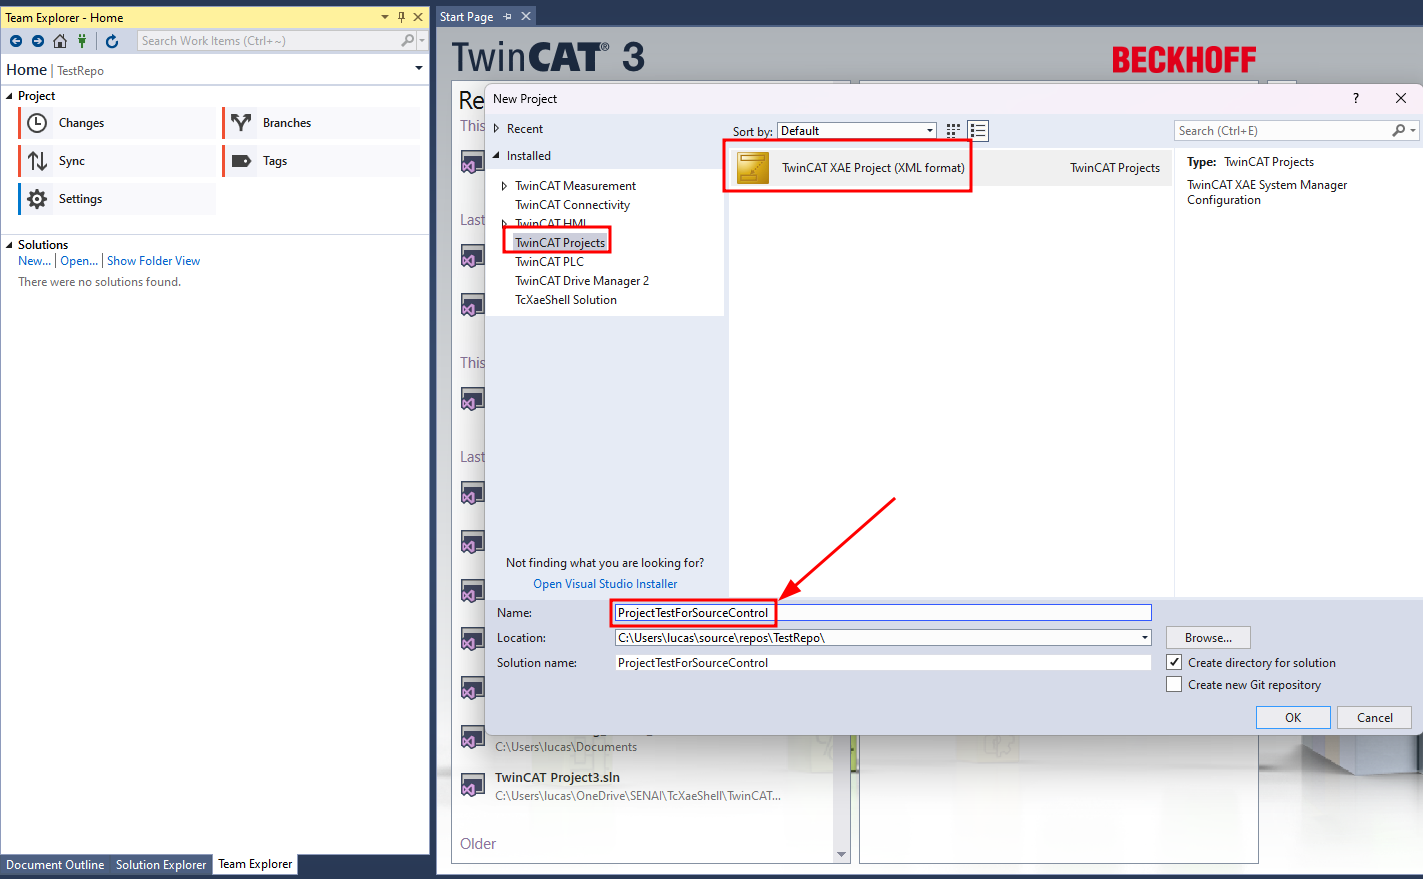
Creating a new XAE Project
Now we can create a new TwinCAT XAE Project in the folder that we just cloned to our machine. In my case, the location is: C:\Users\lucas\source\repos\TestRepo\
Working with Changes Tab and .gitignore
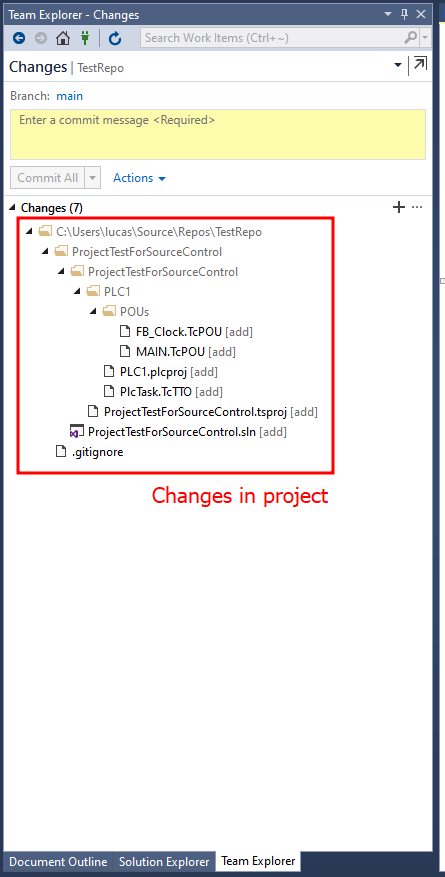
Now, if we look at the Changes tab, we should notice that we have changes in our local repository, as shown below:
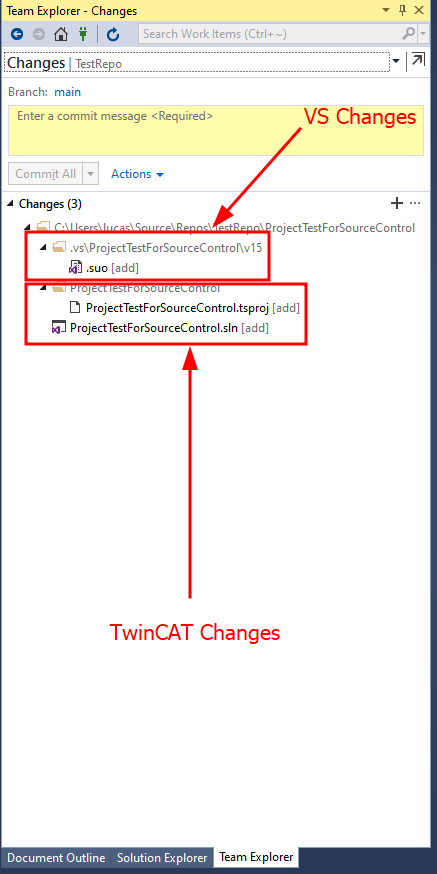
Reviewing these changes, we can see that there are modifications in the .suo file (changes in Visual Studio) and changes in the TwinCAT 3 Project.
Another best practice is to add Visual Studio changes to our .gitignore. We don’t need to track these changes, so adding them to .gitignore ensures Git ignores them.
For more info about .gitignore, see Jakob Sagatowski’s Version Control video @30:21, or you can simply clone my TestRepo from here and copy the .gitignore file to your local repository root folder.
Following this example, I’ll add a simple FB_Clock function to our project and see what happens in the Changes tab. If you’re not familiar with this, I recommend reading the TwinCAT 3 Basics post.
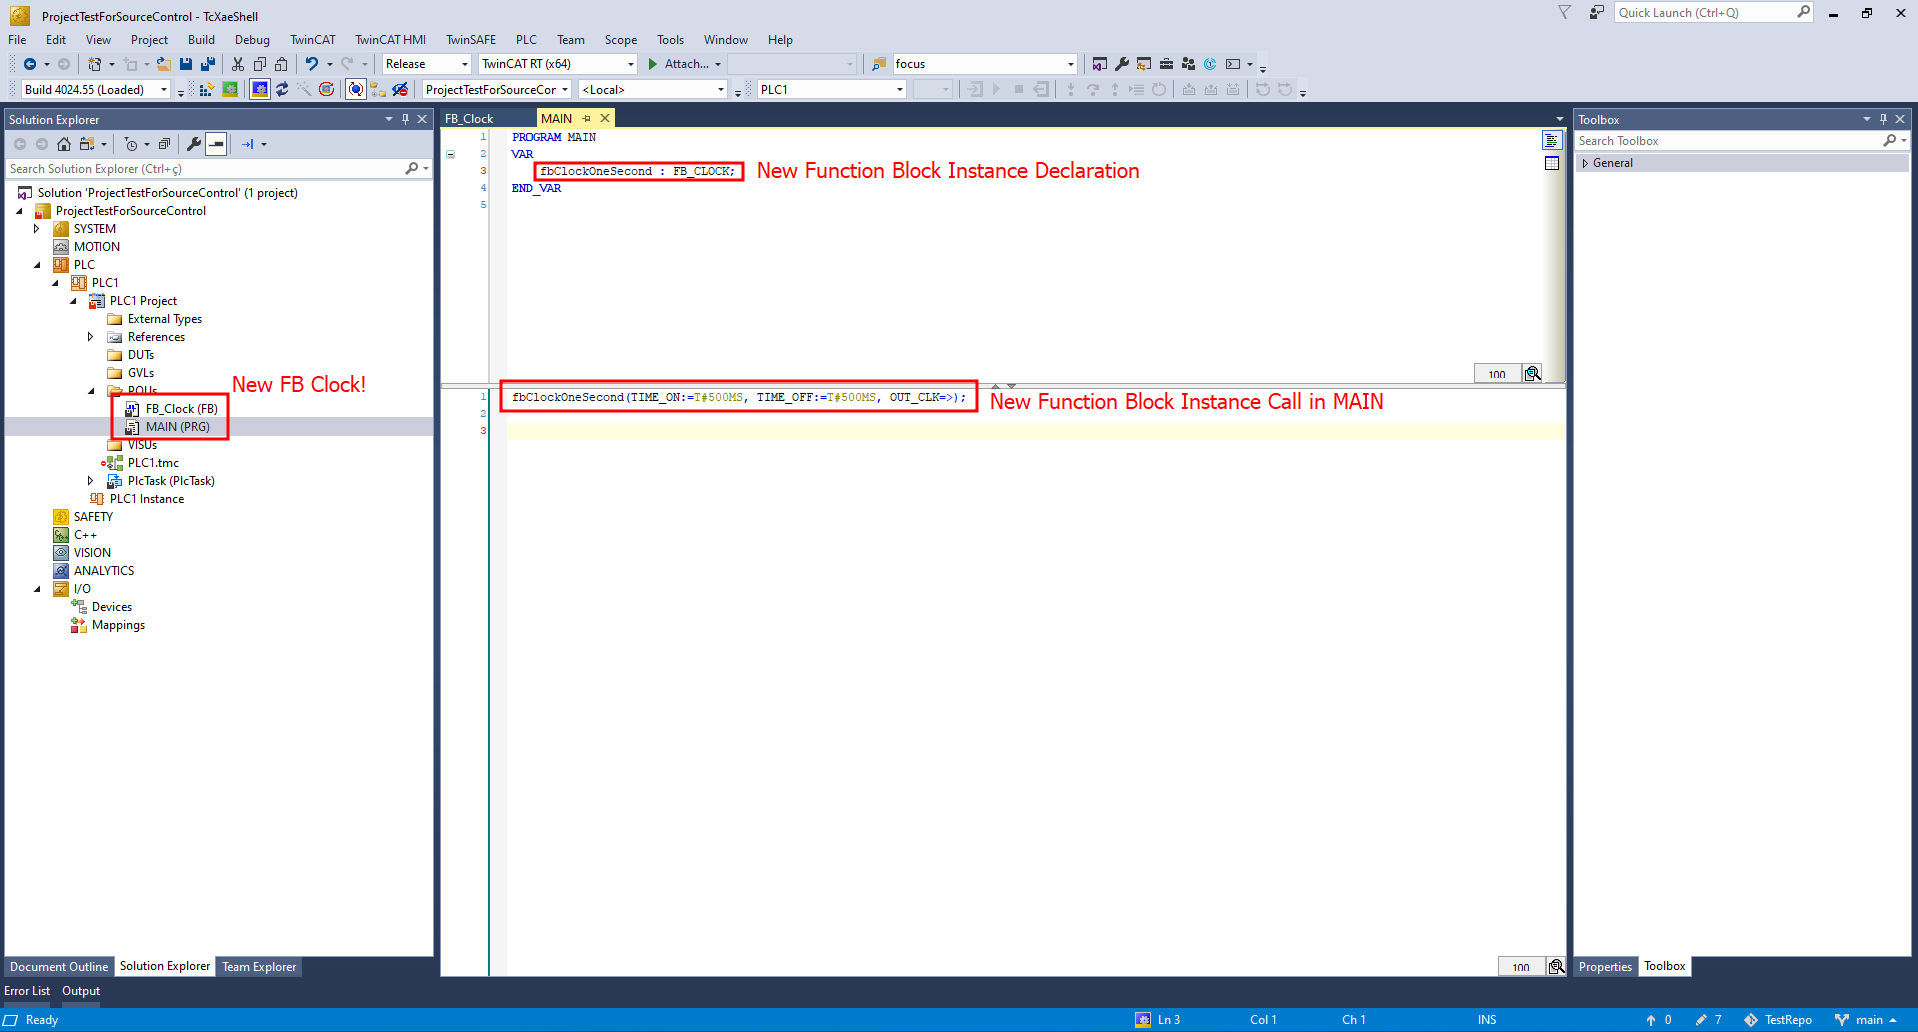
Now, when we look at the Changes tab, we should see the modifications made to the project.
Again, in Jakob Sagatowski’s Version Control video @43:10, you can explore more of what you can do with the Changes tab (Microsoft Git Compare Tool) and the TwinCAT Compare Tool @44:45.
To save time and space in this post, we won’t cover the compare tool again here.
Staging changes and commit
Still in the Changes tab, we can Stage (similar to “add” in Gitbash) the project changes. Here you can stage file-by-file or stage all changes in the solution.
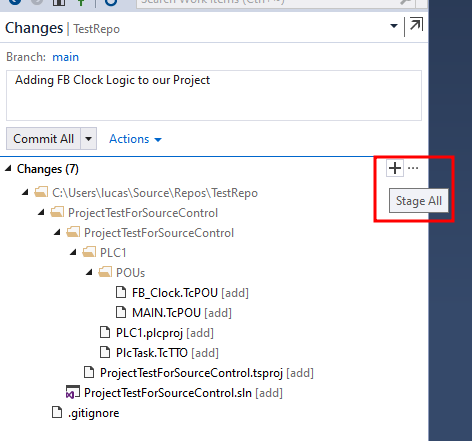
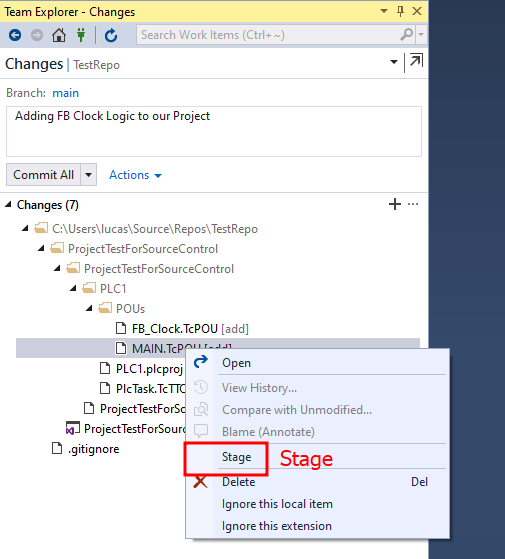
From my perspective, and as a former IT professional, I never recommend using the “Stage All” button (in the same way that we never recommend
git add .in IT software development). The right way to do it is to stage file-by-file to ensure that what you’re staging is exactly what you want.
After staging the desired files, we need to add a commit message and push these changes to our local repository. Note that these changes are not yet in our GitHub cloud, only in our local repo.
Always write a clear, concise message about what you did in this commit. Avoid generic texts like “Adding Some Changes” or “Adding customer requests”; prefer specific messages like “Adding new IFM pressure 4-20mA sensor logic” or “Removing inductive sensor for parts count”.
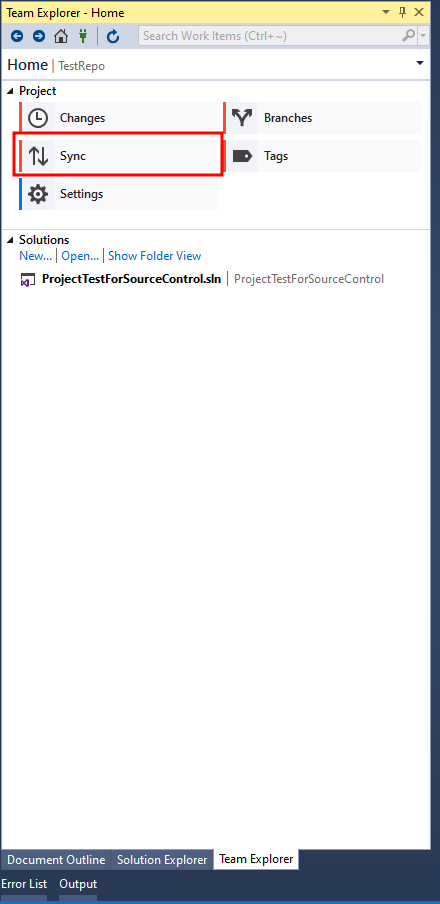
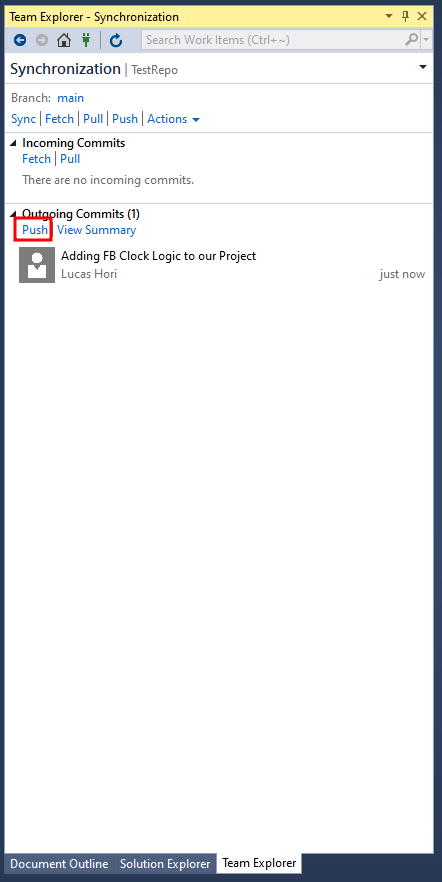
Synchronization with GitHub | Sync Tab
Finally, we can go to the Sync tab and push our changes to the GitHub cloud.
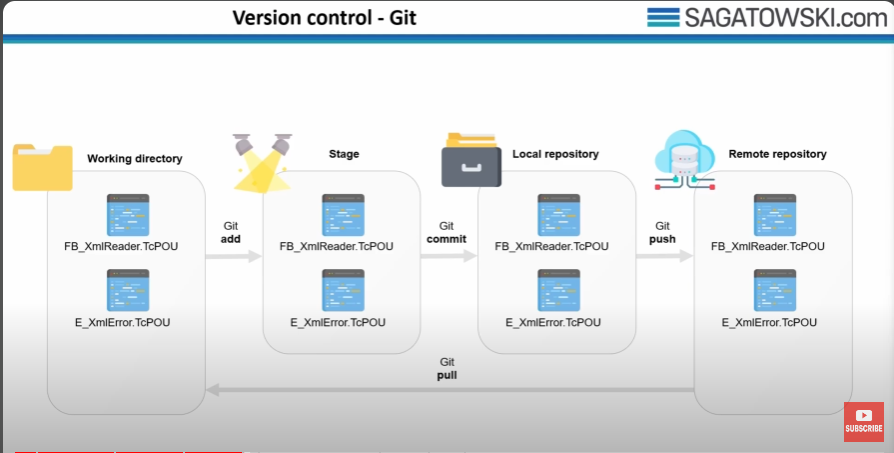
If you’re feeling lost in this process, refer to the flowchart below, developed by our colleague Jakob Sagatowski and shared (thanks again, Jakob!) in his YouTube Tutorial:
Recommendations
Now that we are almost done with Team Explorer Basics, I must recommend changes in TwinCAT settings to achieve the best results:
- Pin version,
- Lock library versions,
- Ask TwinCAT to separate configuration files,
- Keep Unrestored Links,
- Disable LineIDs,
- Enable Git Plugin.
This content above is available on our Brazilian colleague’s blog, Automação Web.
Final Question
Finally, I want to address an important question when using source control plugins.
The question is: How can I manage two programmers in the same Git Repository?
Let’s say Programmer A clones our repository with the FB_Clock 1 second logic and adds a new FB_Clock with 500 ms to it. Meanwhile, Programmer B also clones the repository with the FB_Clock 1 second and adds a new FB_Clock with 250 ms. You can easily see that when either programmer commits to the local repository and tries to push to the Git repository, one of their changes will be overwritten.
For this reason, we need to use features like branches and merge, which will be covered in the next post.