TF6420 - TwinCAT 3 Database Server | Configure Mode
Remember that this page isn’t affiliated with BECKHOFF and MUST NOT be used as official documentation. For that, please refer to the official BECKHOFF webpage.
All content is free, and the main goal is to provide TUTORIALS. If you plan to use ANY of it in production or real applications, it MUST be thoroughly tested before implementation (use the code at your own risk).
For TF6420 TwinCAT 3 Database Server, BECKHOFF Infosys contains comprehensive documentation. I highly encourage you to read it thoroughly!
Configure Mode
The Configure Mode of the TwinCAT 3 Database Server library is the simplest method to establish a connection with a database. Once again, Beckhoff has fully documented this feature on Infosys, so there is no need to cover it in detail here. It’s worth noting that Infosys includes topics already discussed earlier in this blog.
On Infosys, you’ll be able to:
🛠️ Main Features of the Configure Mode (TF6420 | TwinCAT 3 Database Server)
- 🧱 Project Creation
- Use the TwinCAT Connectivity Project template in Visual Studio.
- Add a Database Server project to the solution.
- ⚙️ General Server Settings
- Define the target system (AMS NetID).
- Configure error logging (file path, max size, verbosity).
- Enable/disable installed database types.
- Set parameters like:
MaxStringLengthMaxByteArrayLengthDBNullAllowedDBConnectionTimeoutDBCommandTimeout
- 🗃️ Adding a New Database Configuration
- Use Add New Database in the context menu.
- Choose native or ODBC type (limited support).
- Optionally configure a failover database for redundancy.
- Edit settings via UI or XML file.
- 🔁 Creating AutoLog Groups
- Define which PLC variables sync with the database.
- Choose startup mode:
ManualorAutoStart. - Set write strategy:
- Append new lines
- Ring buffer (by time or cycle)
- Update in-place
- Define log mode:
By cycleorOn change
Note: It’s possible to use TwinCAT Target Browser to Drag and Drop variables into AutoLog feature.
If the Manual option is selected, the communication has to be enabled via the function block FB_PLCDBAutoLog or for AutoLog view. See Starting Autolog By PLC chapter.
- 🔌 ADS Device Setup
- Set:
- Device name
- AMS NetID
- AMS Port
- Timeout
- Connection type (
bySymbolNameorbyIndexGroup)
- Set:
- 🧩 Configuring Symbols
- Add symbols manually or via TwinCAT Target Browser (drag & drop).
- Each symbol needs:
SymbolNameDatabase column nameDataTypeBitSizeIndexGroup/IndexOffset(if applicable)
- 📊 Database Table Setup
- Link variables to an existing or custom database table.
- Use SQL Query Editor to create tables if needed.
- Map symbol groups to columns in the selected structure.
- ✅ Project Activation
- Use Activate Configuration to apply the project to the target system.
- Logging starts based on the defined startup mode.
- 👁️ AutoLog Viewer
- Visual tool to start/stop AutoLog mode manually.
- Displays:
- Connected AutoLog groups
- Symbol list
- Logging status and errors
- Basic controls:
Login,Start,Stop,Logout
- 🧾 InformationLog View
- Visualize internal logs (errors, events, info).
- Access logs locally or via network route.
- Useful for debugging distributed deployments.
Starting Autolog By PLC
To start Autolog by PLC, it is needed to use the FB_PLCDBAutoLogEvt PLC function block.
Many functions in the
Tc3_Databaselibrary are now implemented as Methods. Therefore, developers must pay close attention to how these methods are called.
For example, you need to call the instance for only one PLC cycle. Failing to do so may lead to unexpected behavior in the library.
This can be achieved by using the R_TRIG and F_TRIG blocks in the PLC code.
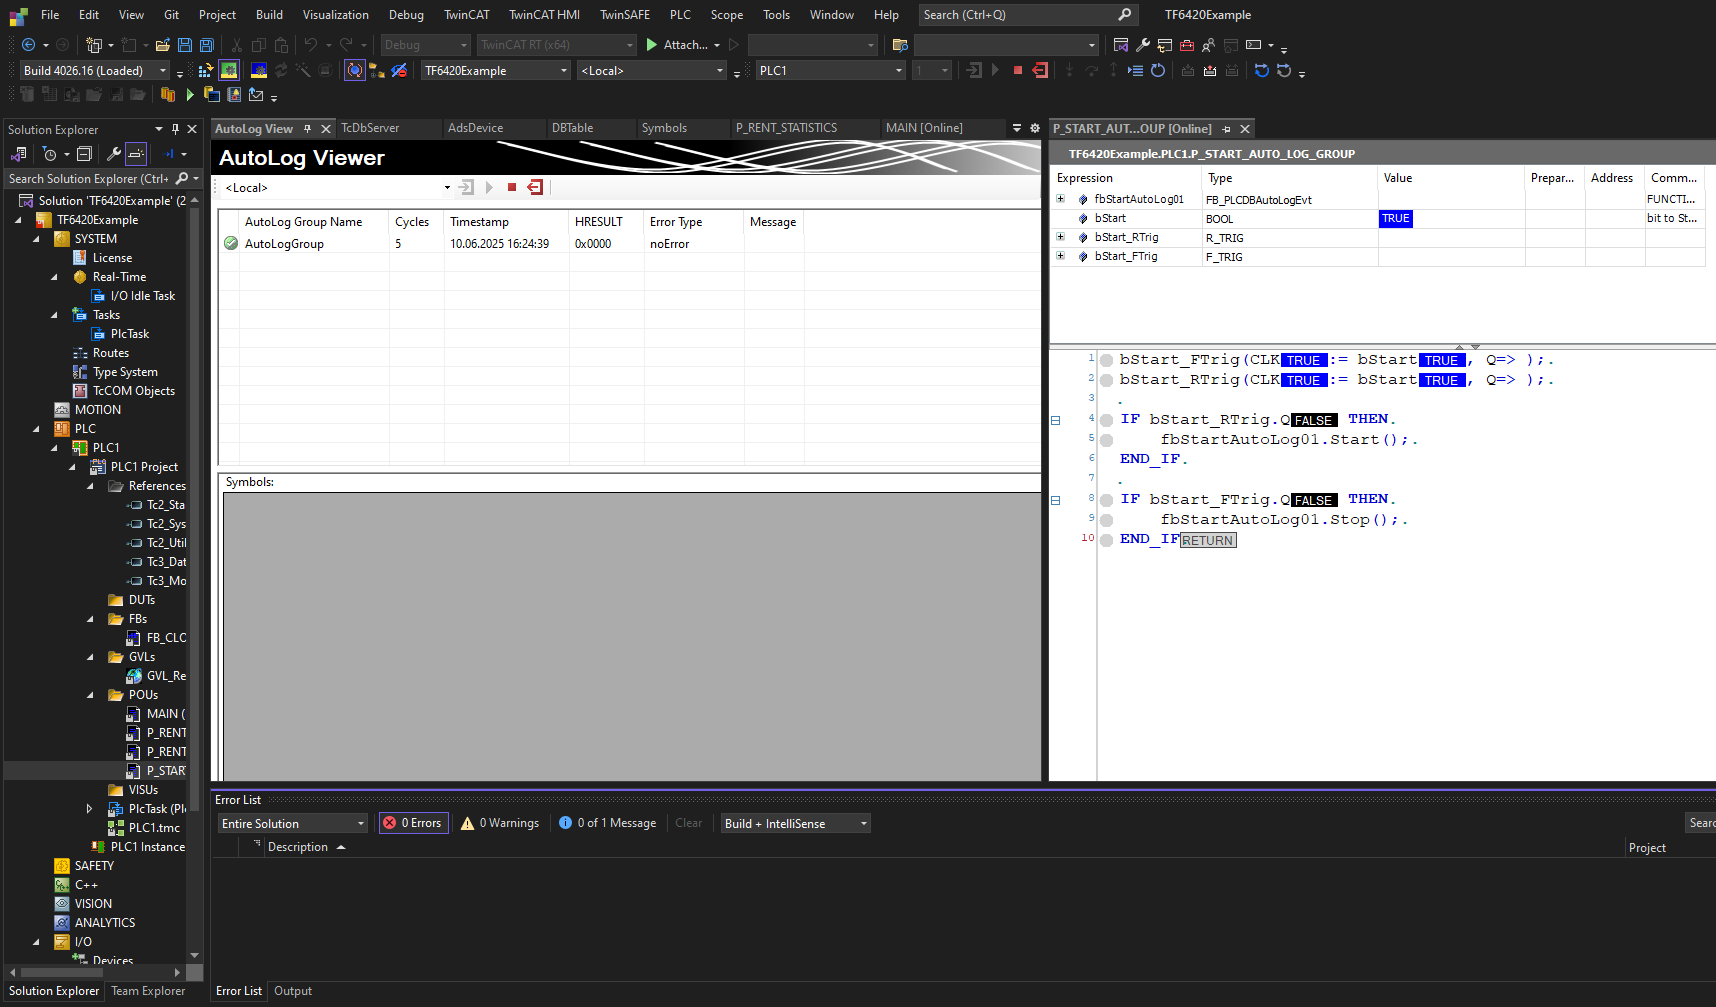 Autolog enabling by PLC using FB_PLCDBAutoLogEvt